Skip to content
Up to 40% Off, Win Your Order for Free
Talk To An Expert
+1 877-770-0567
MESSAGE US
Black Friday
Products
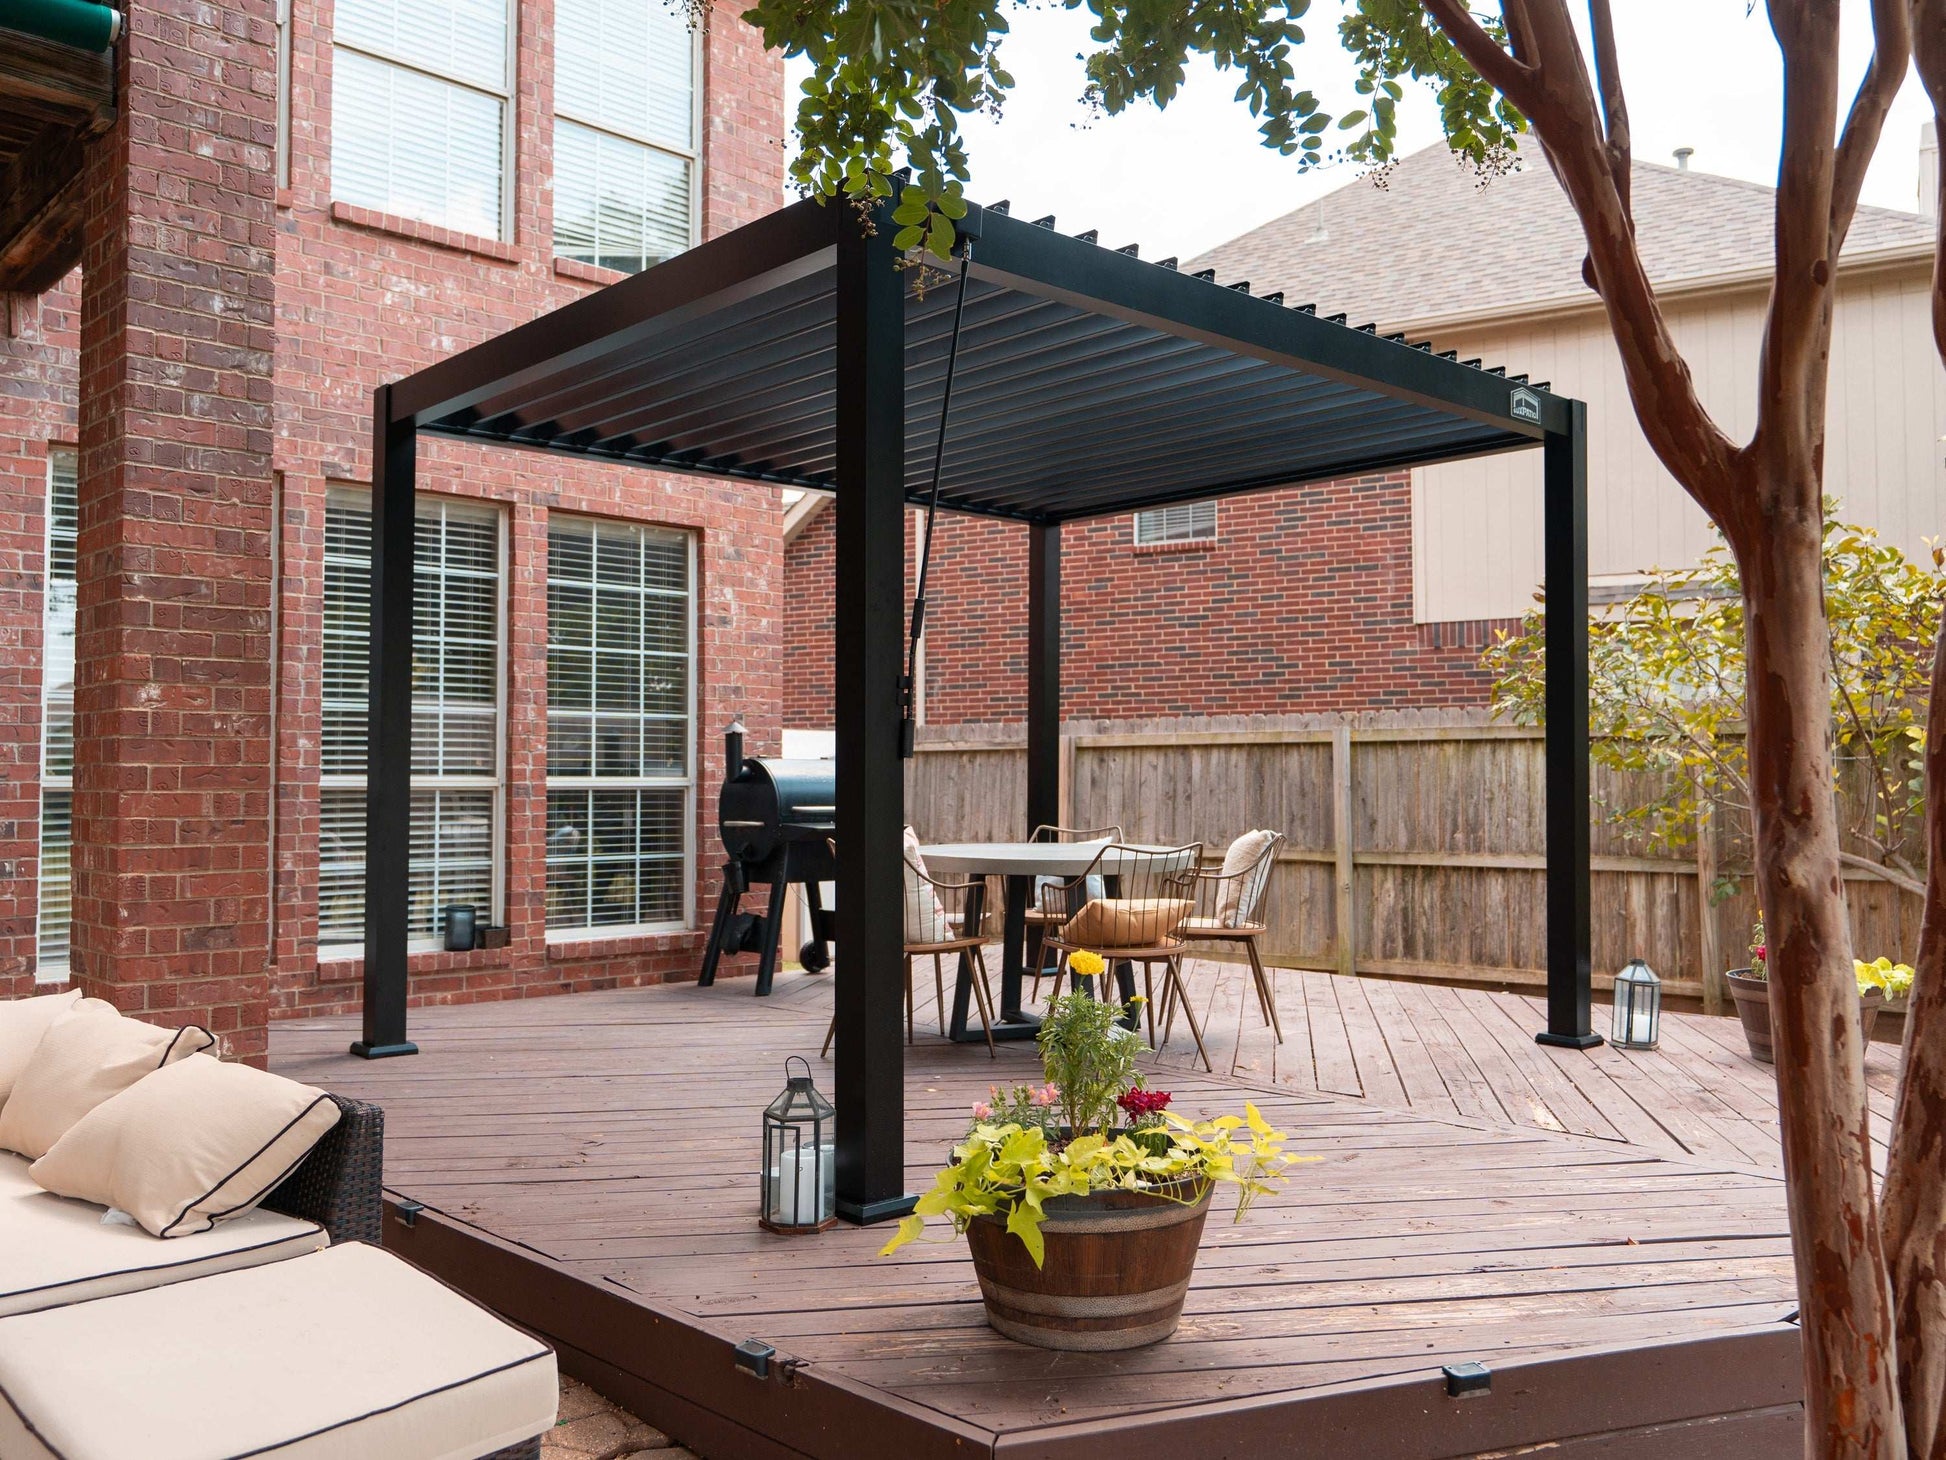
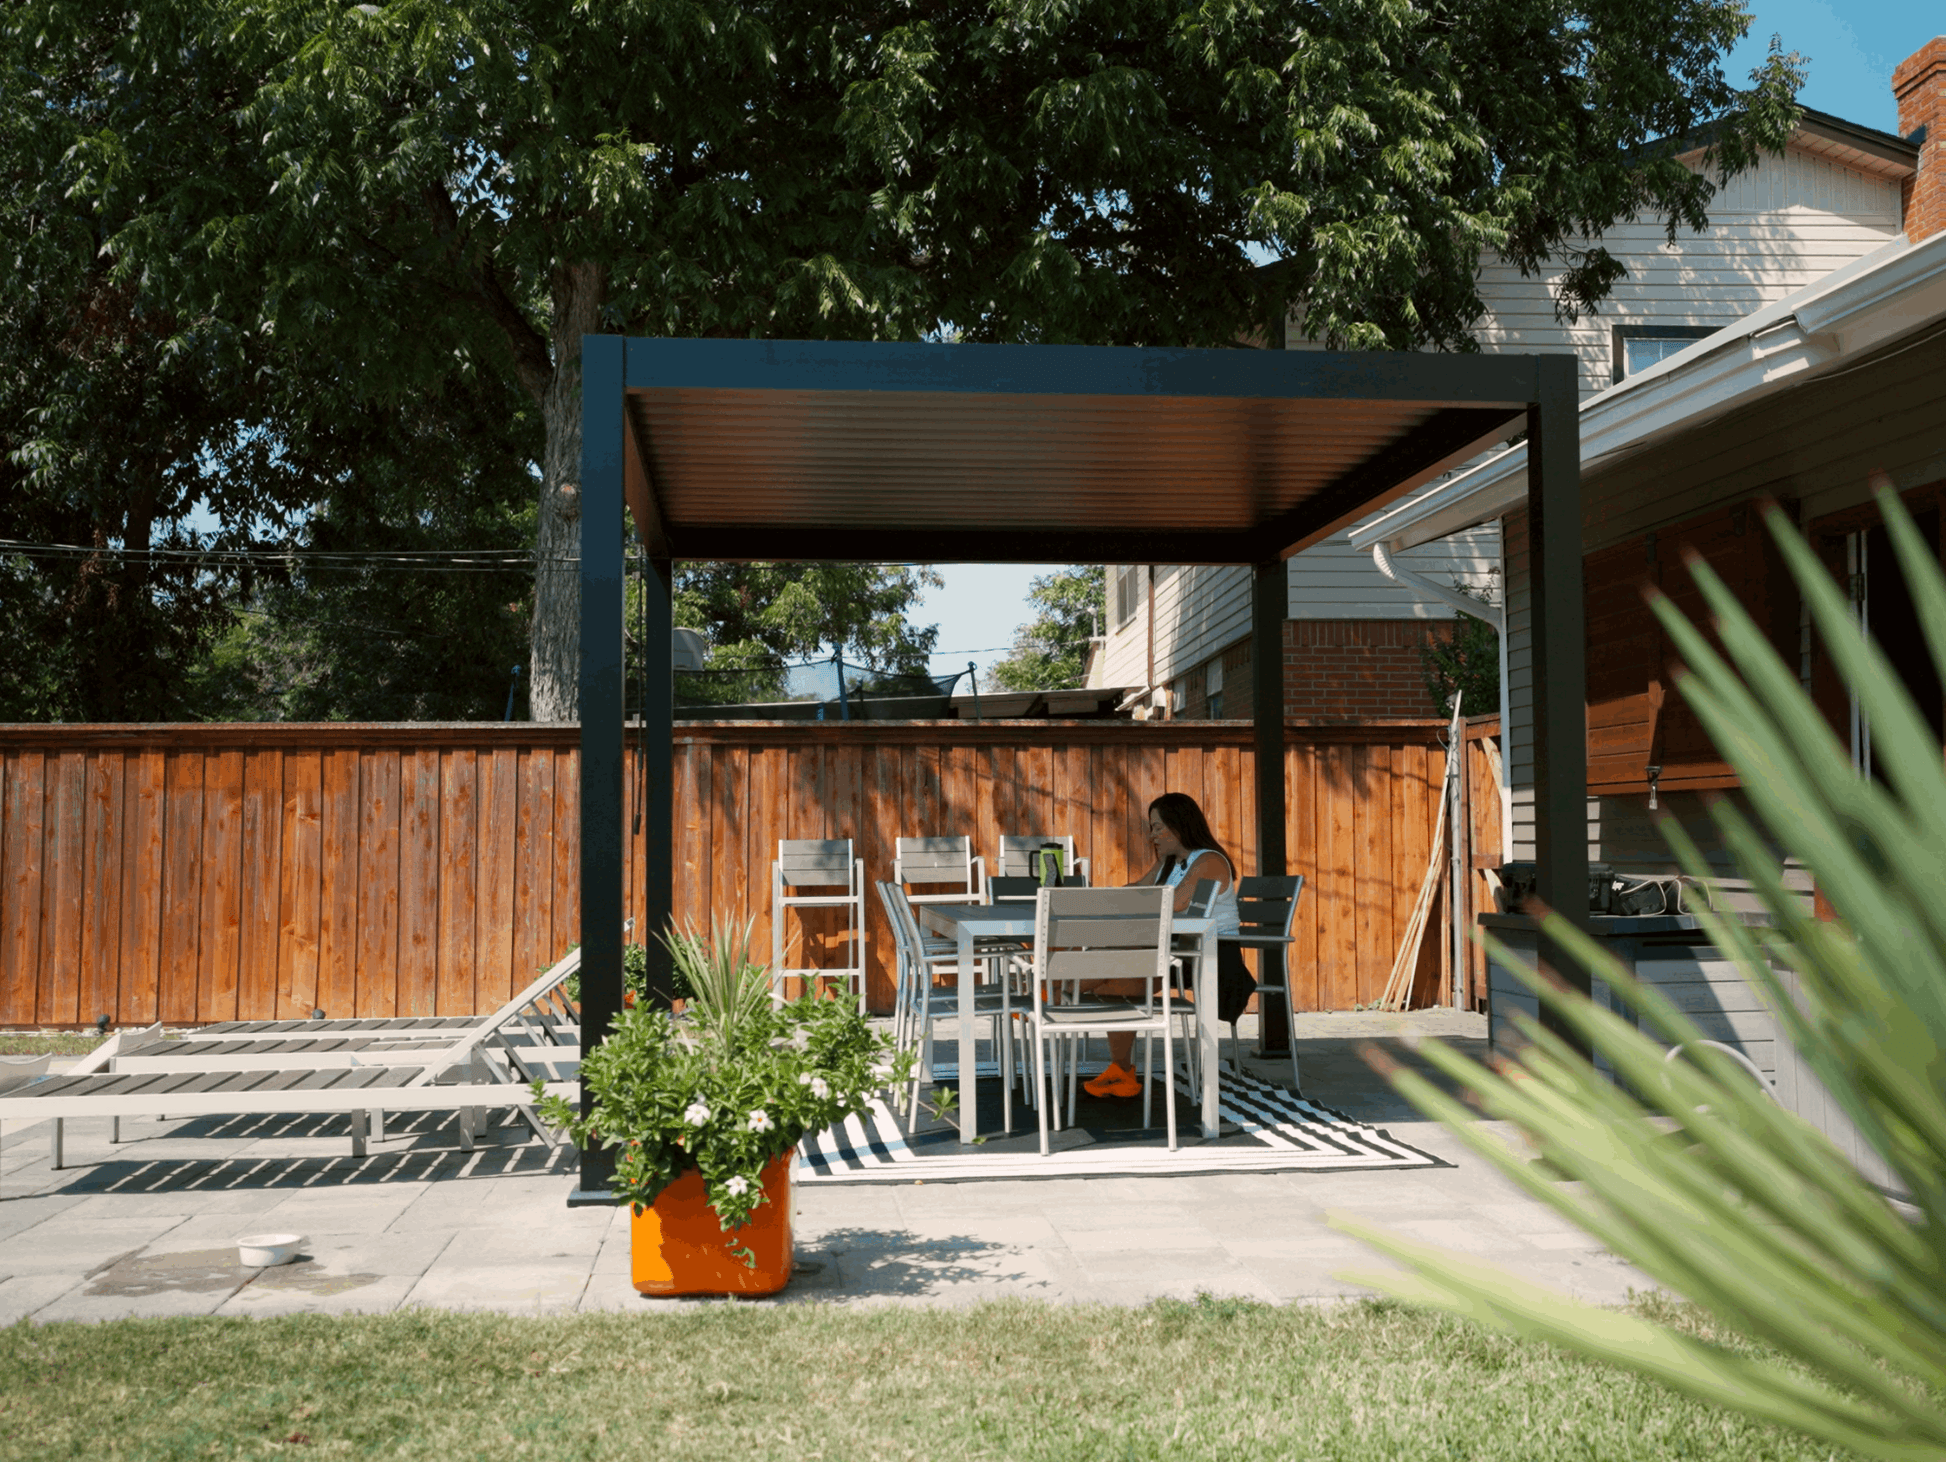
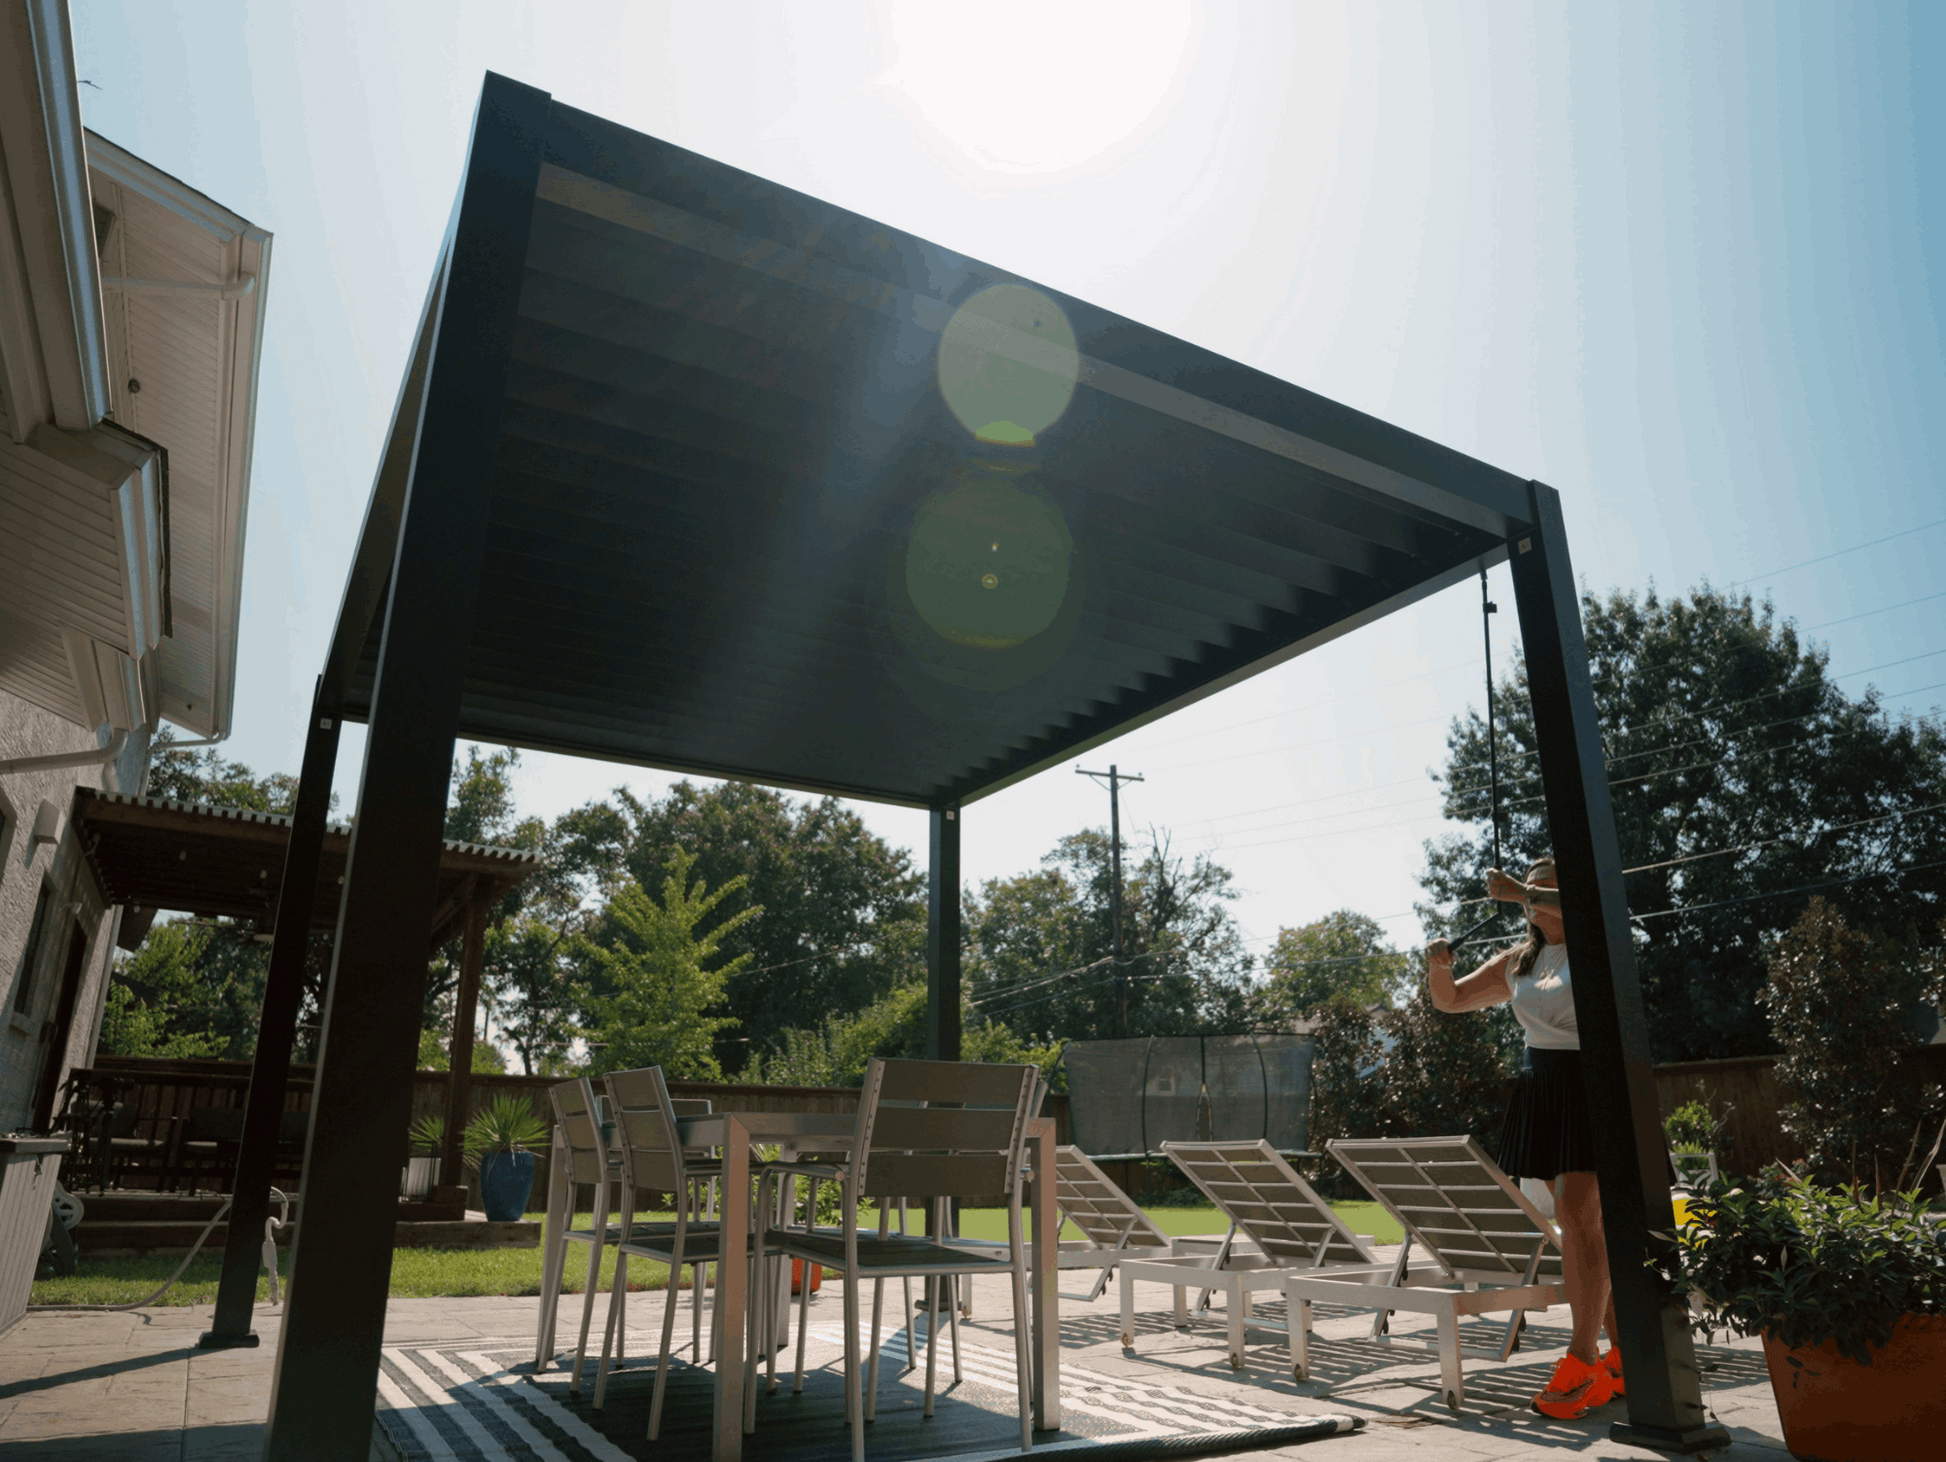
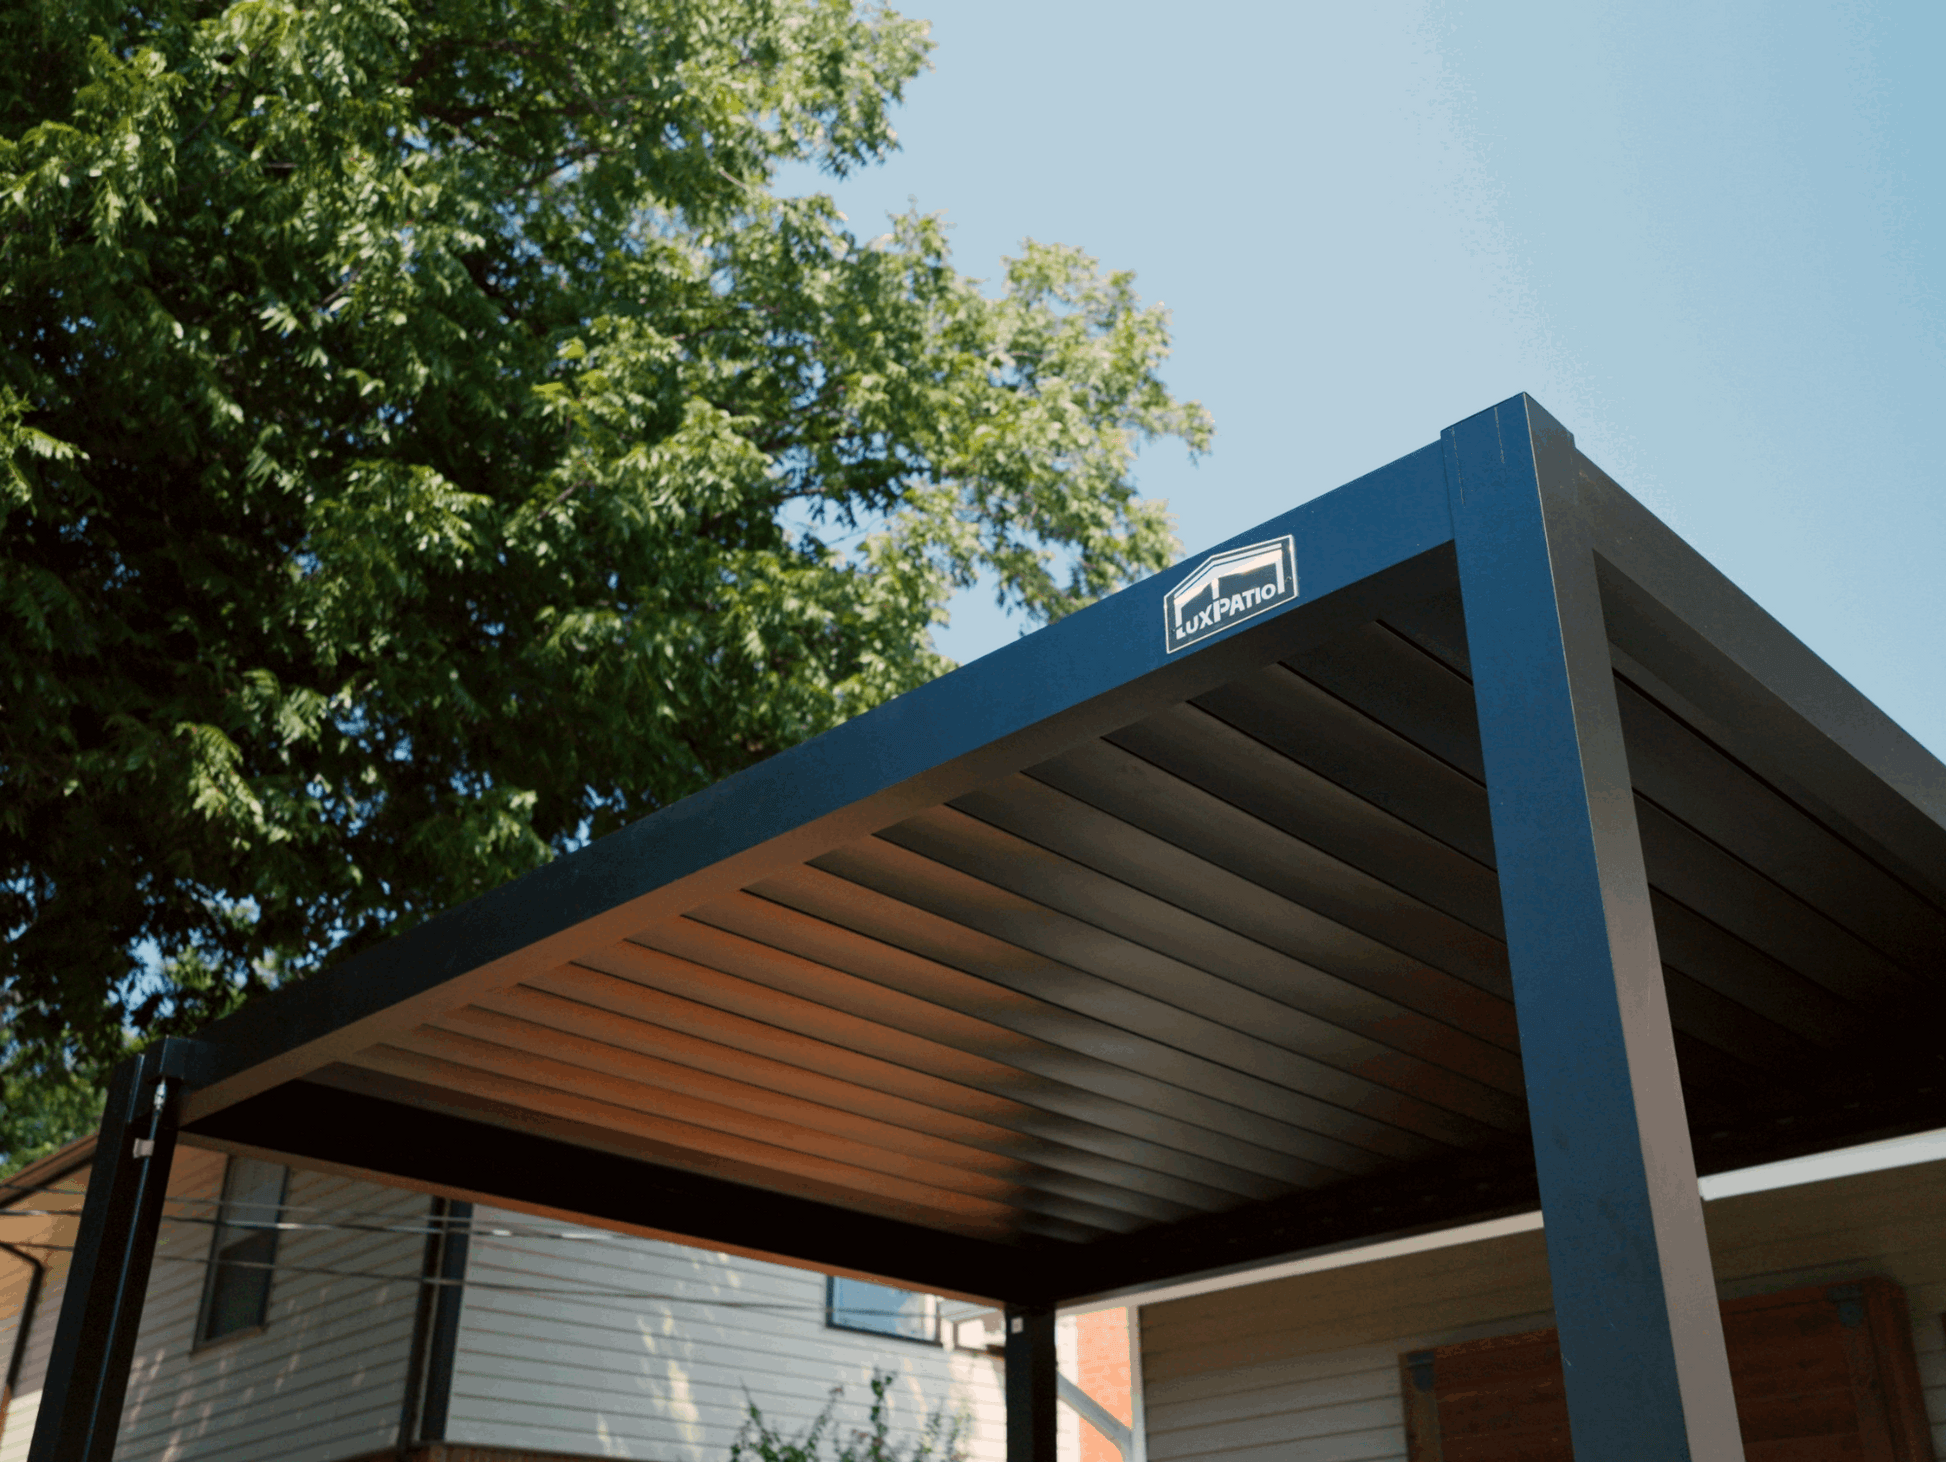
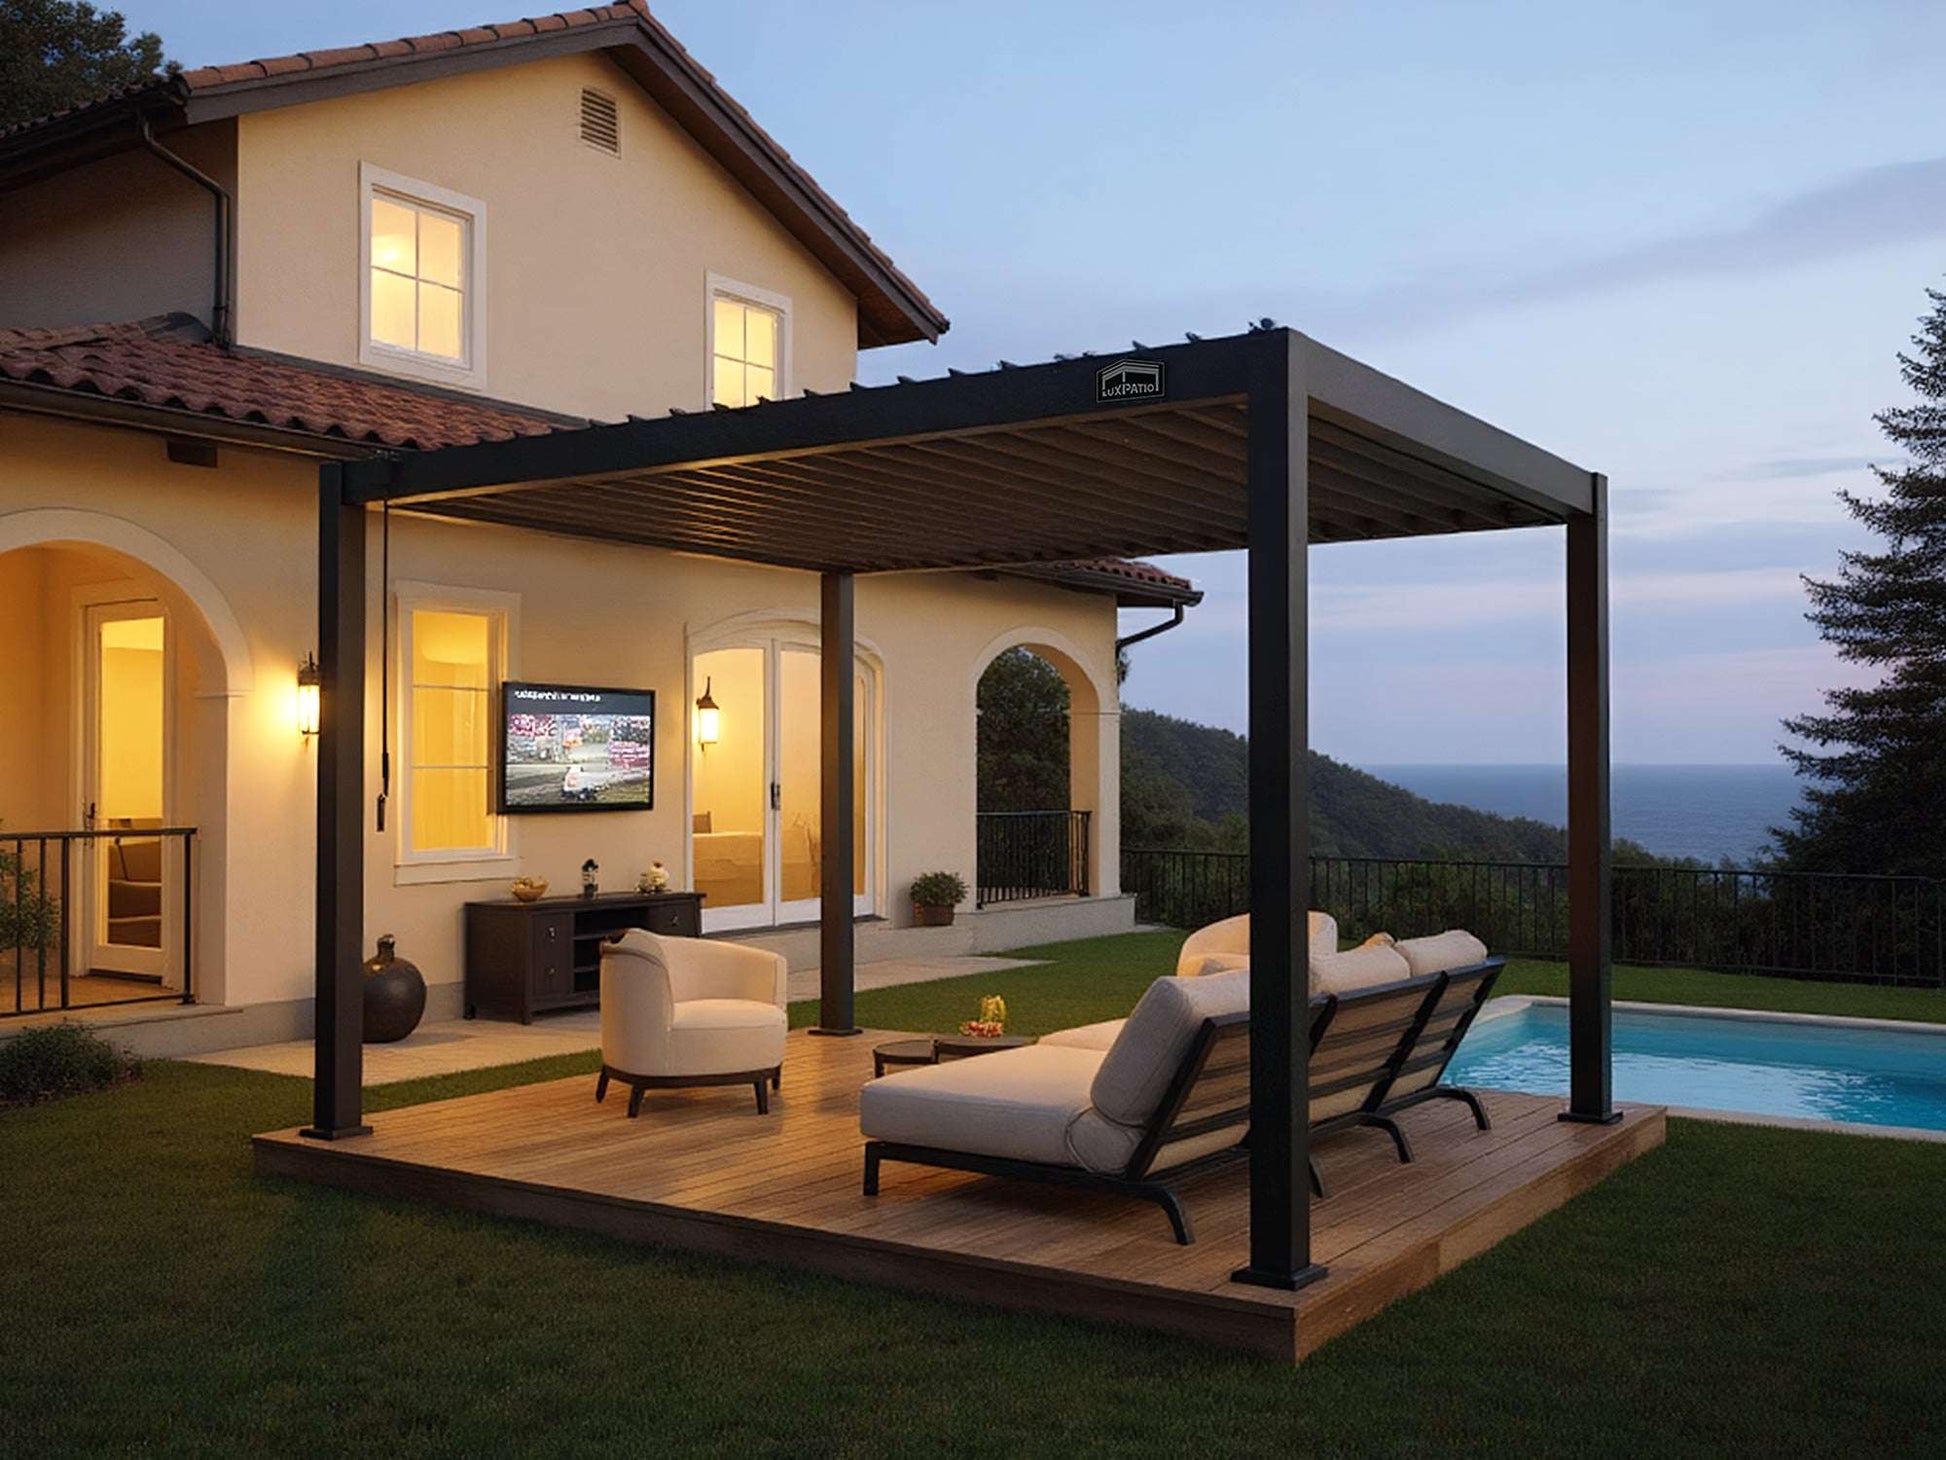
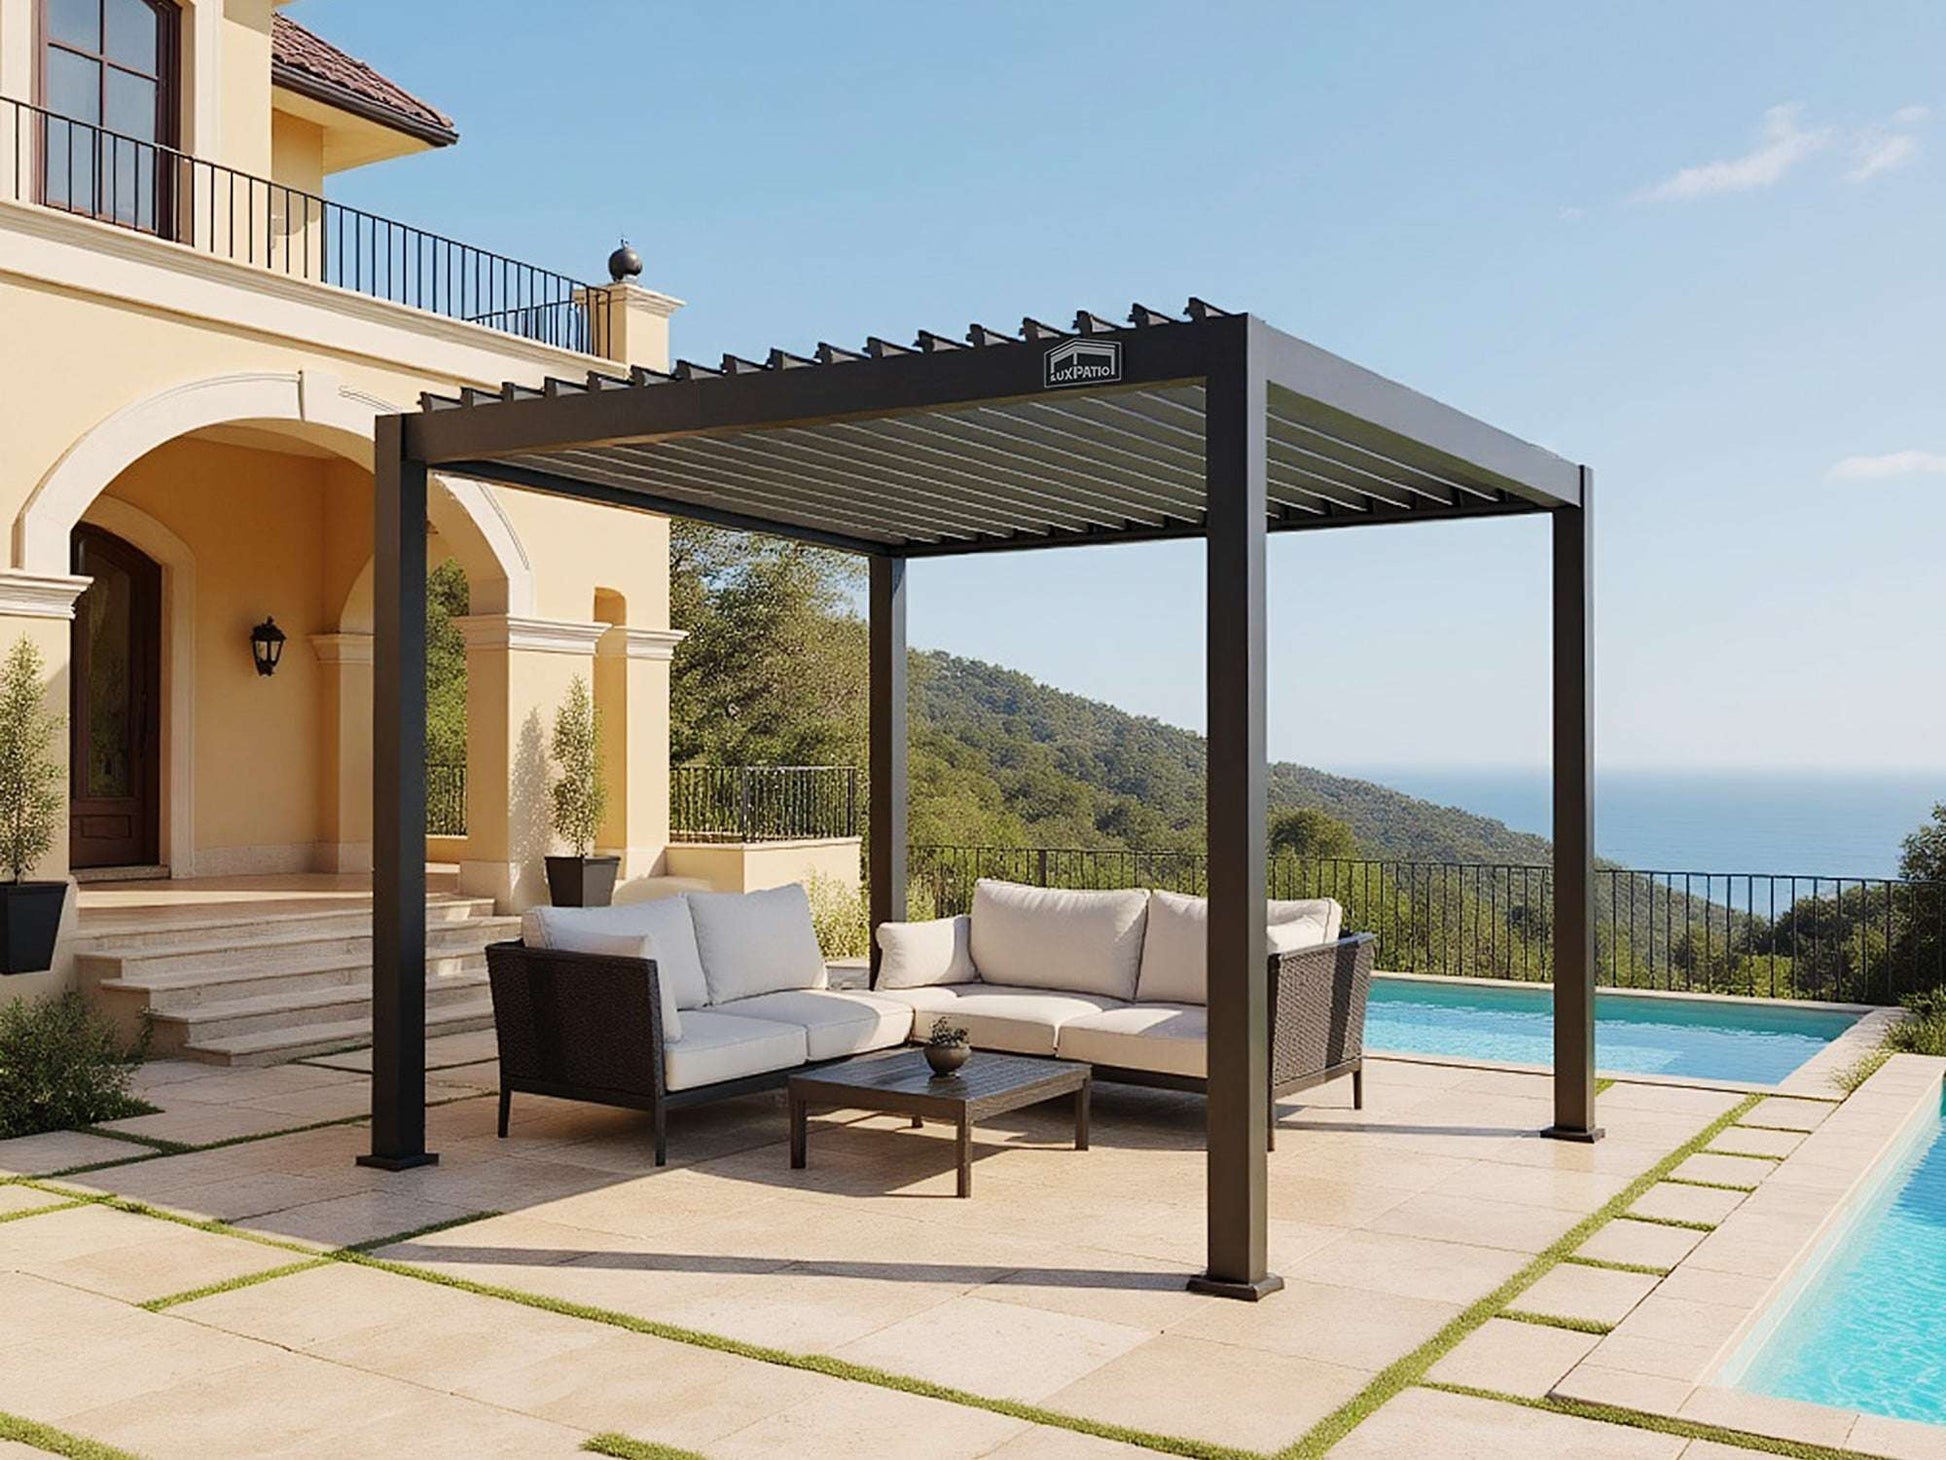
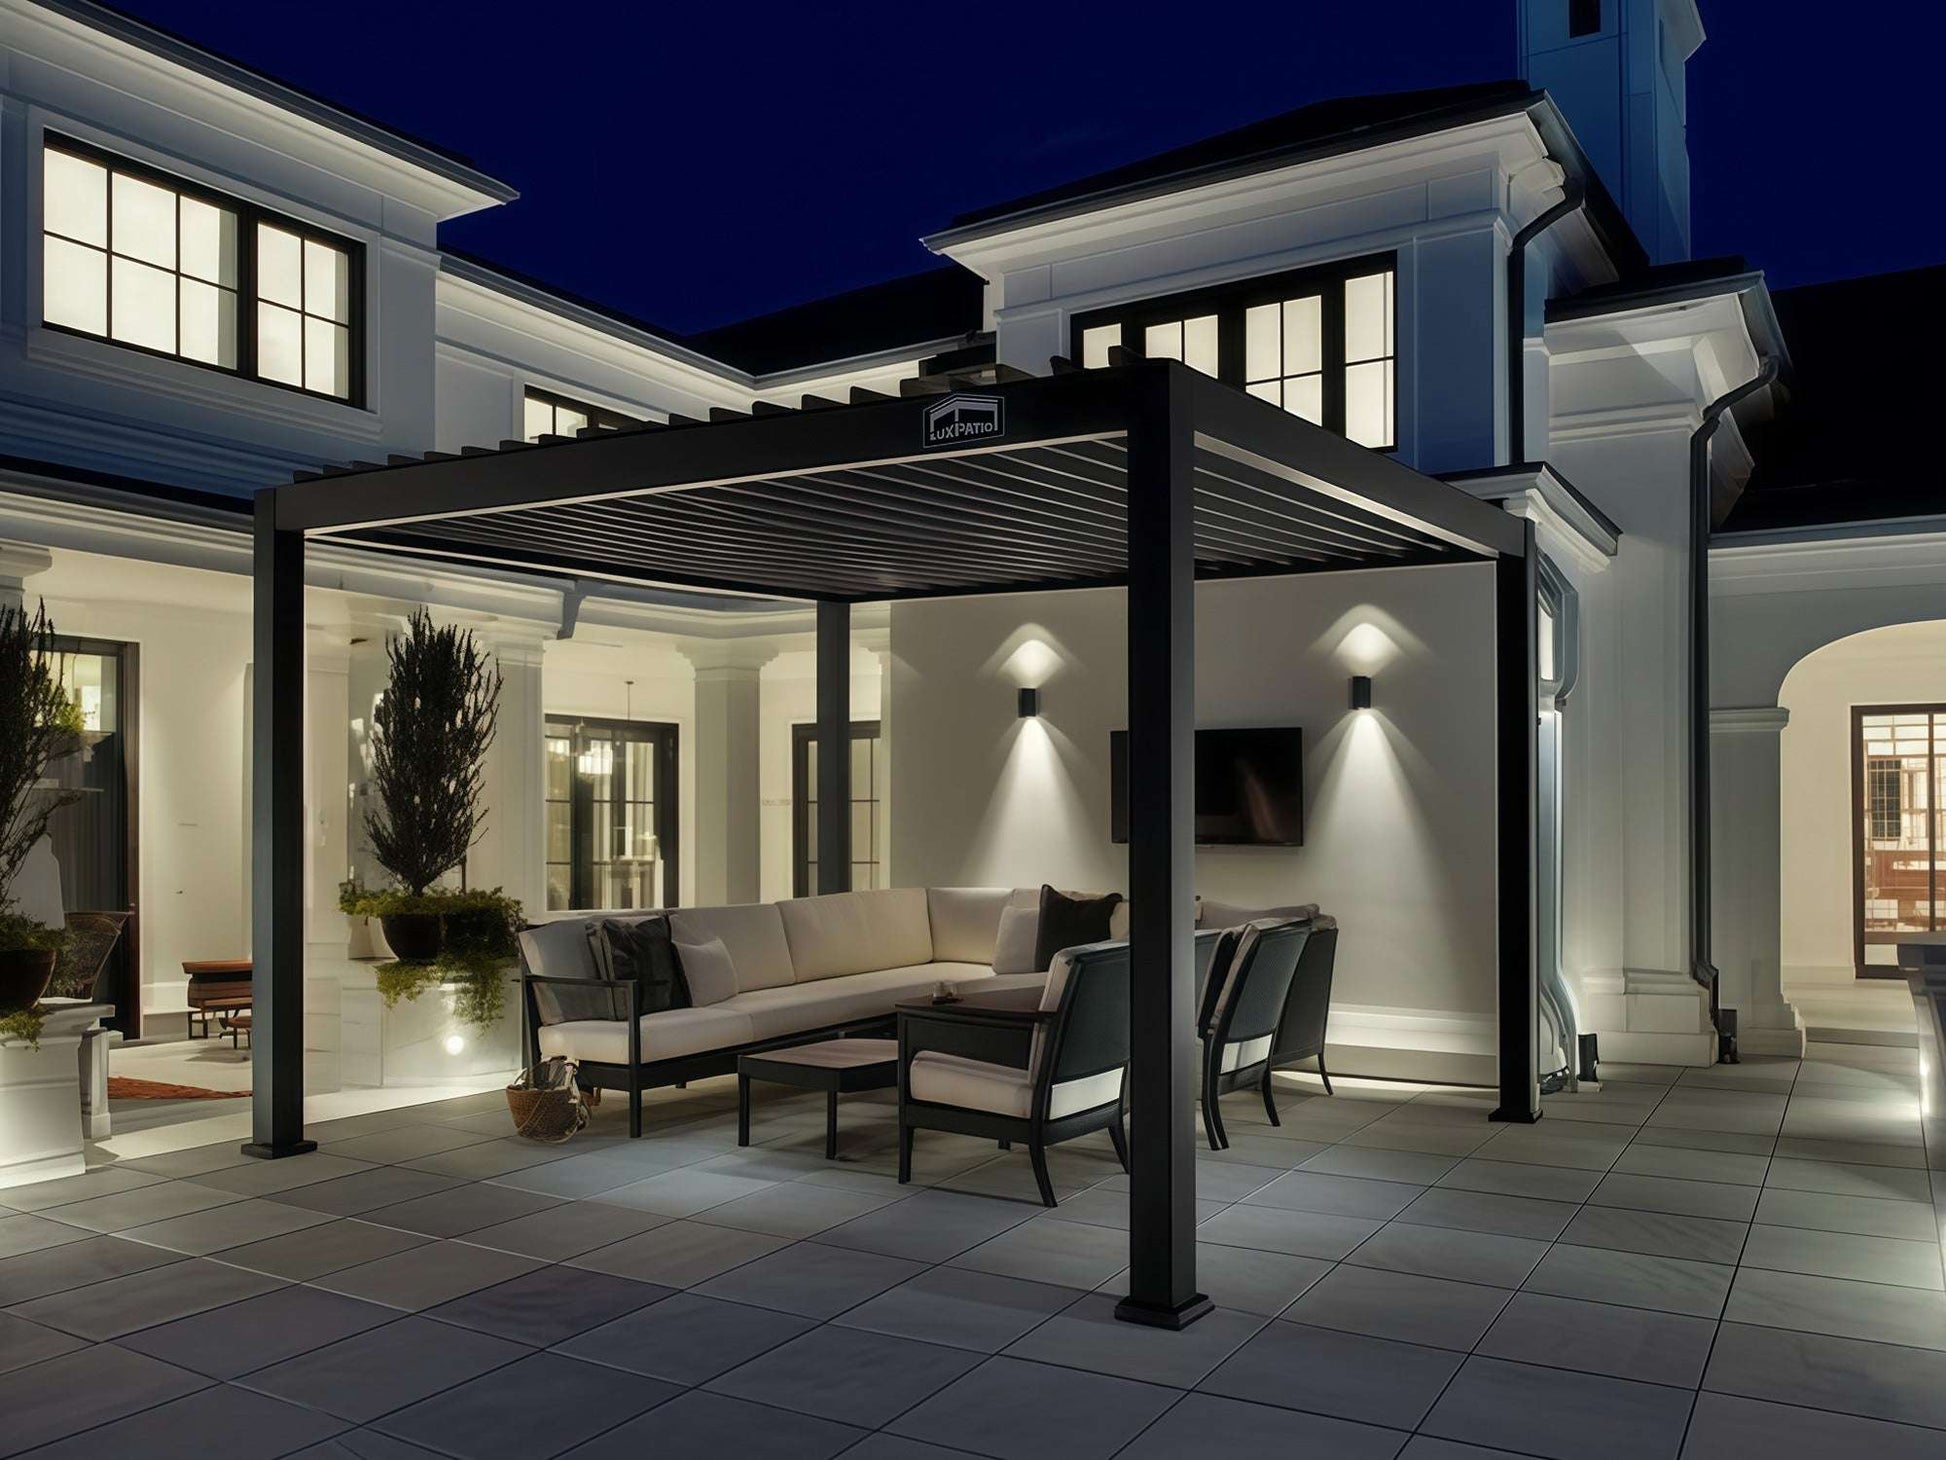
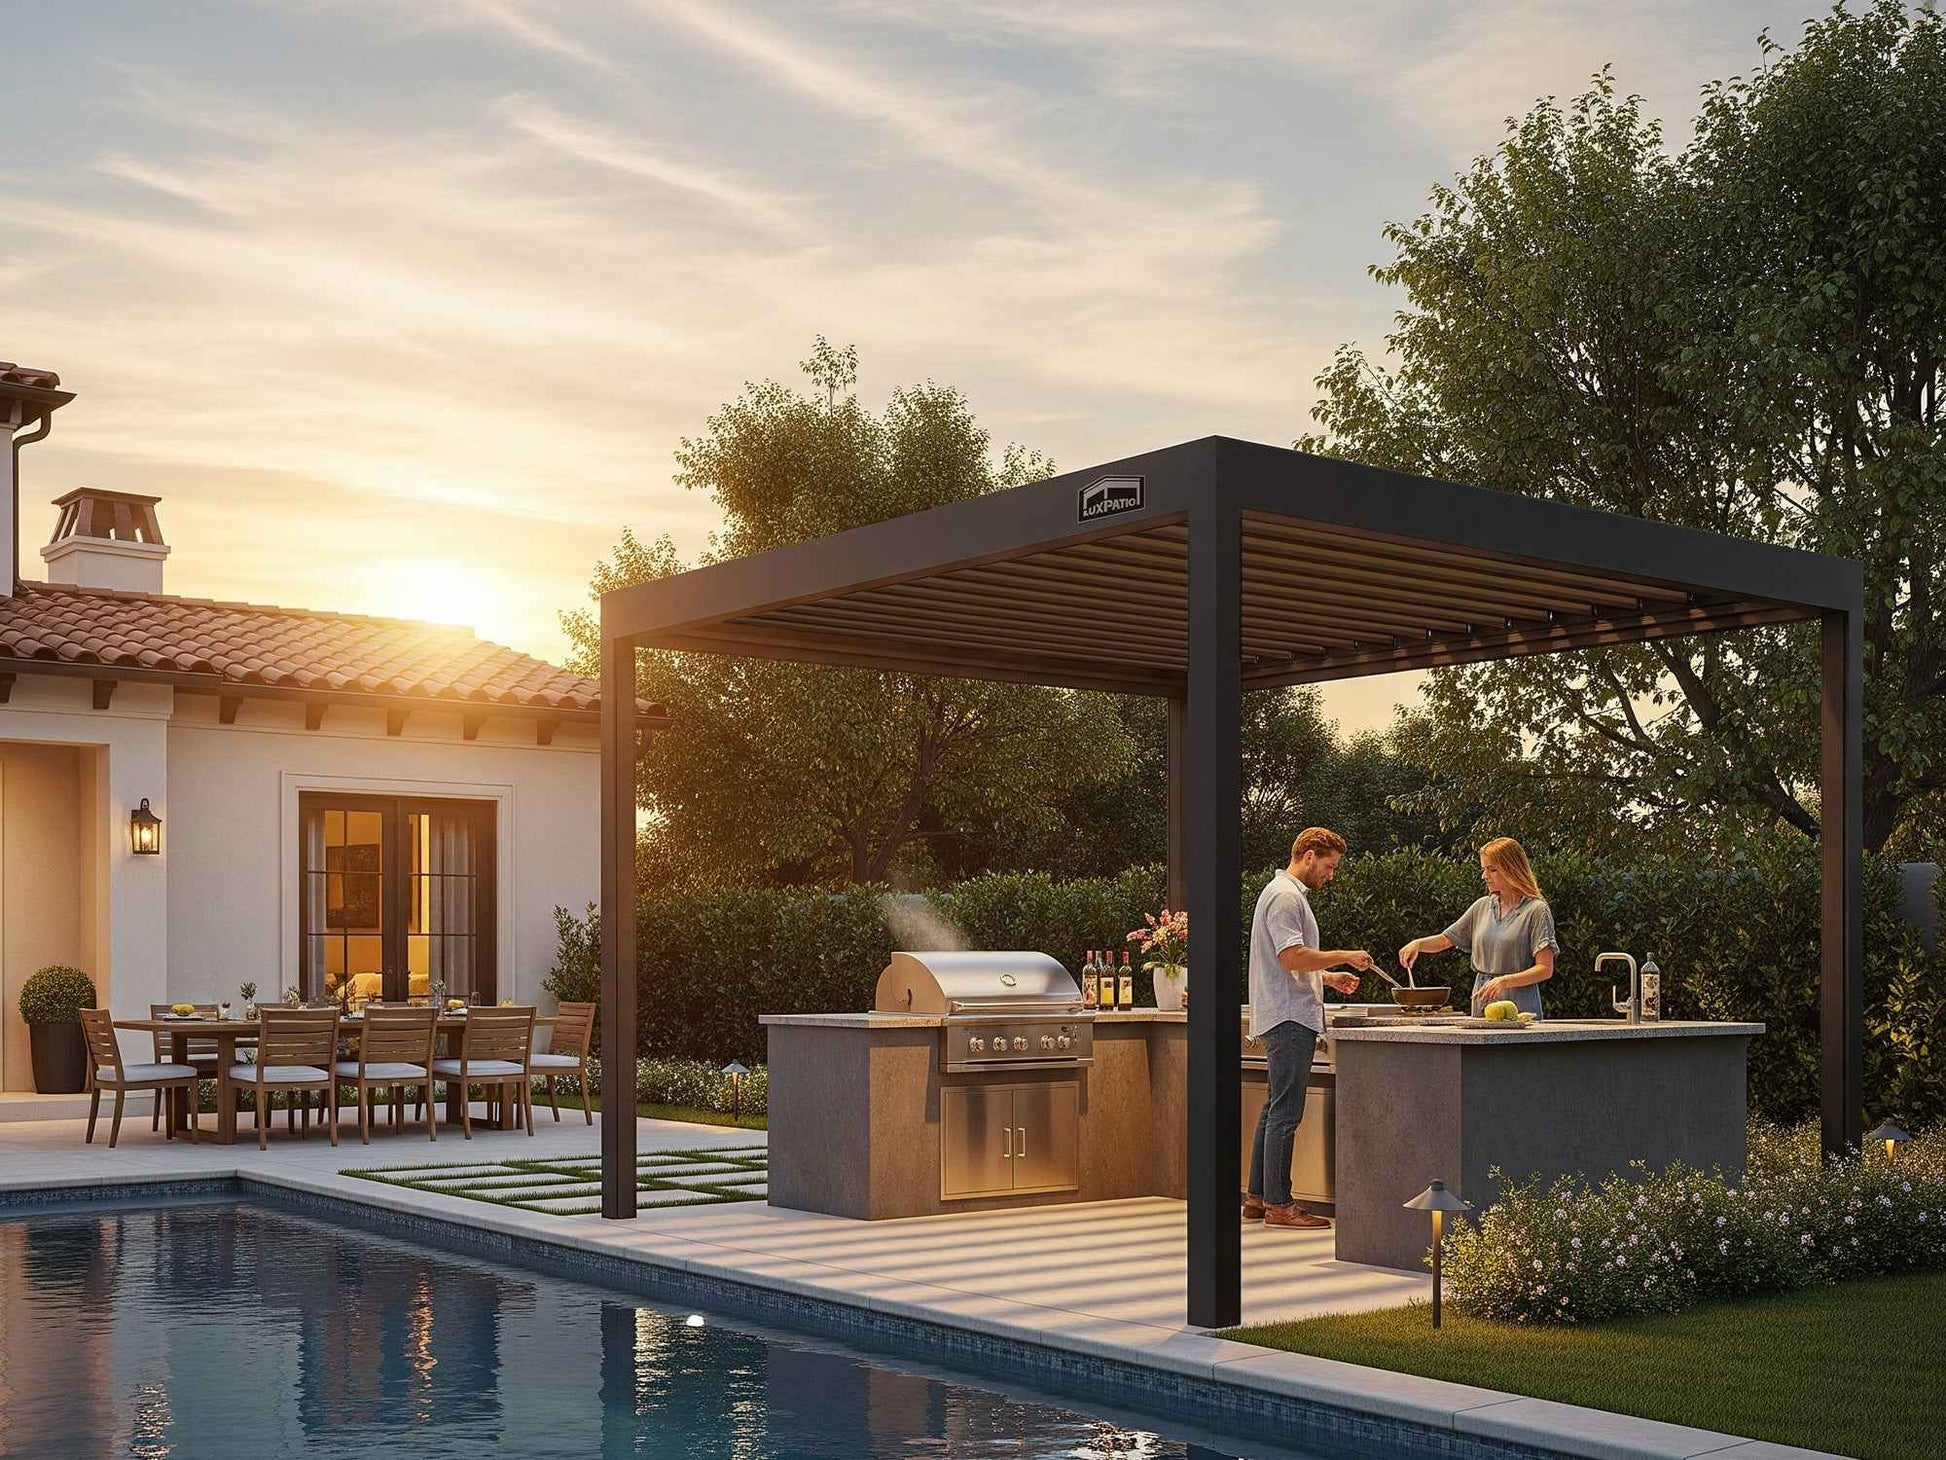
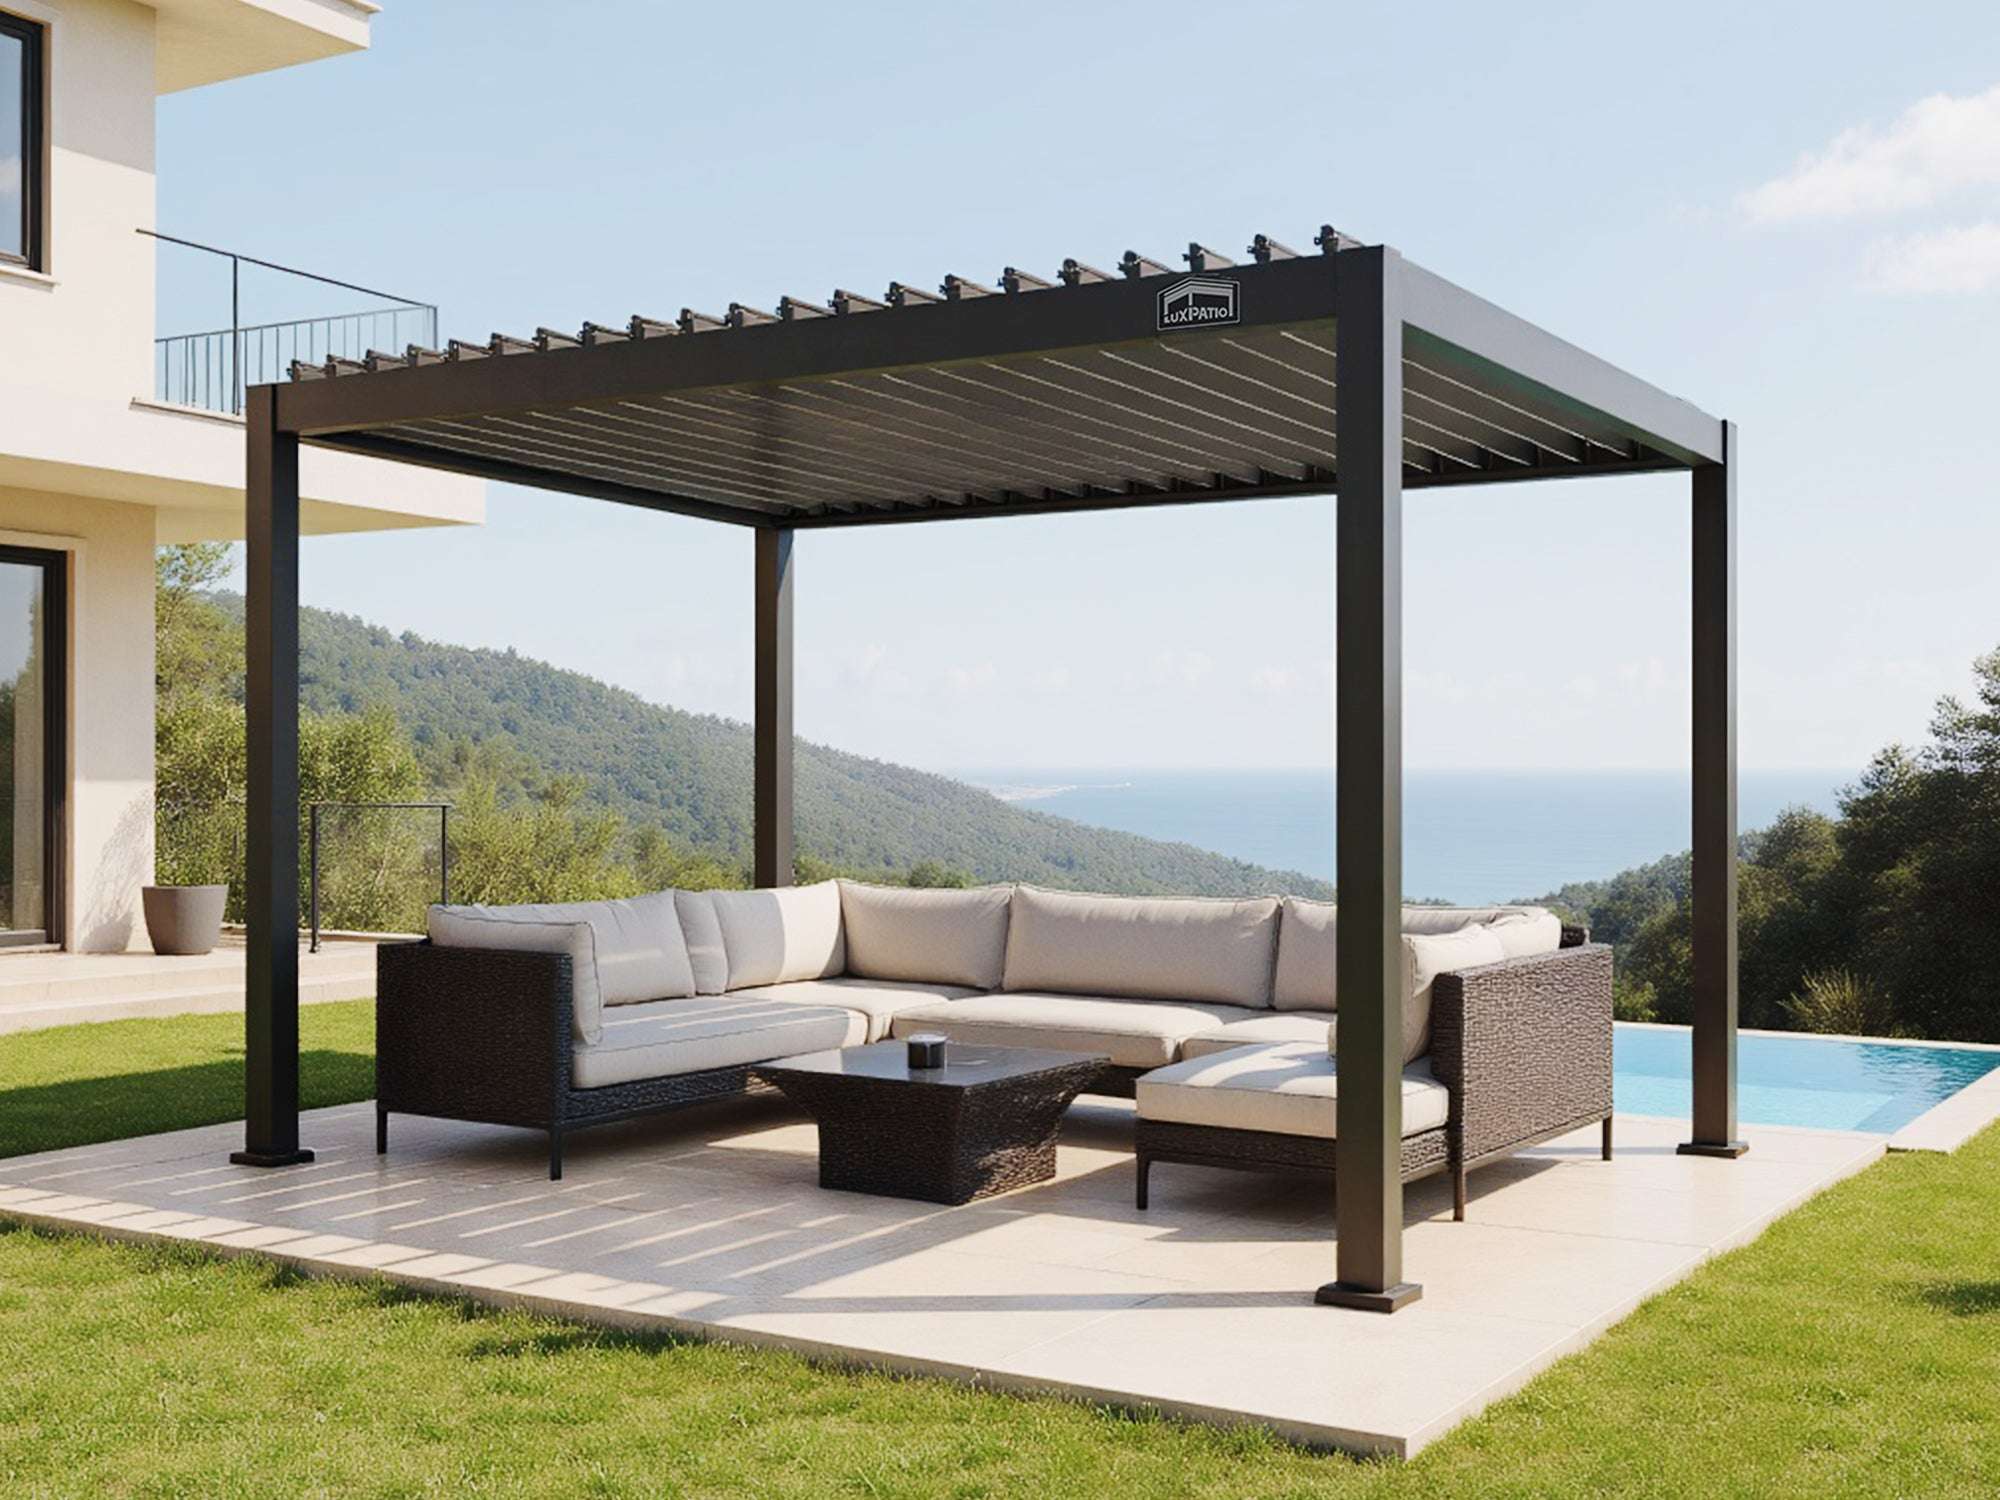
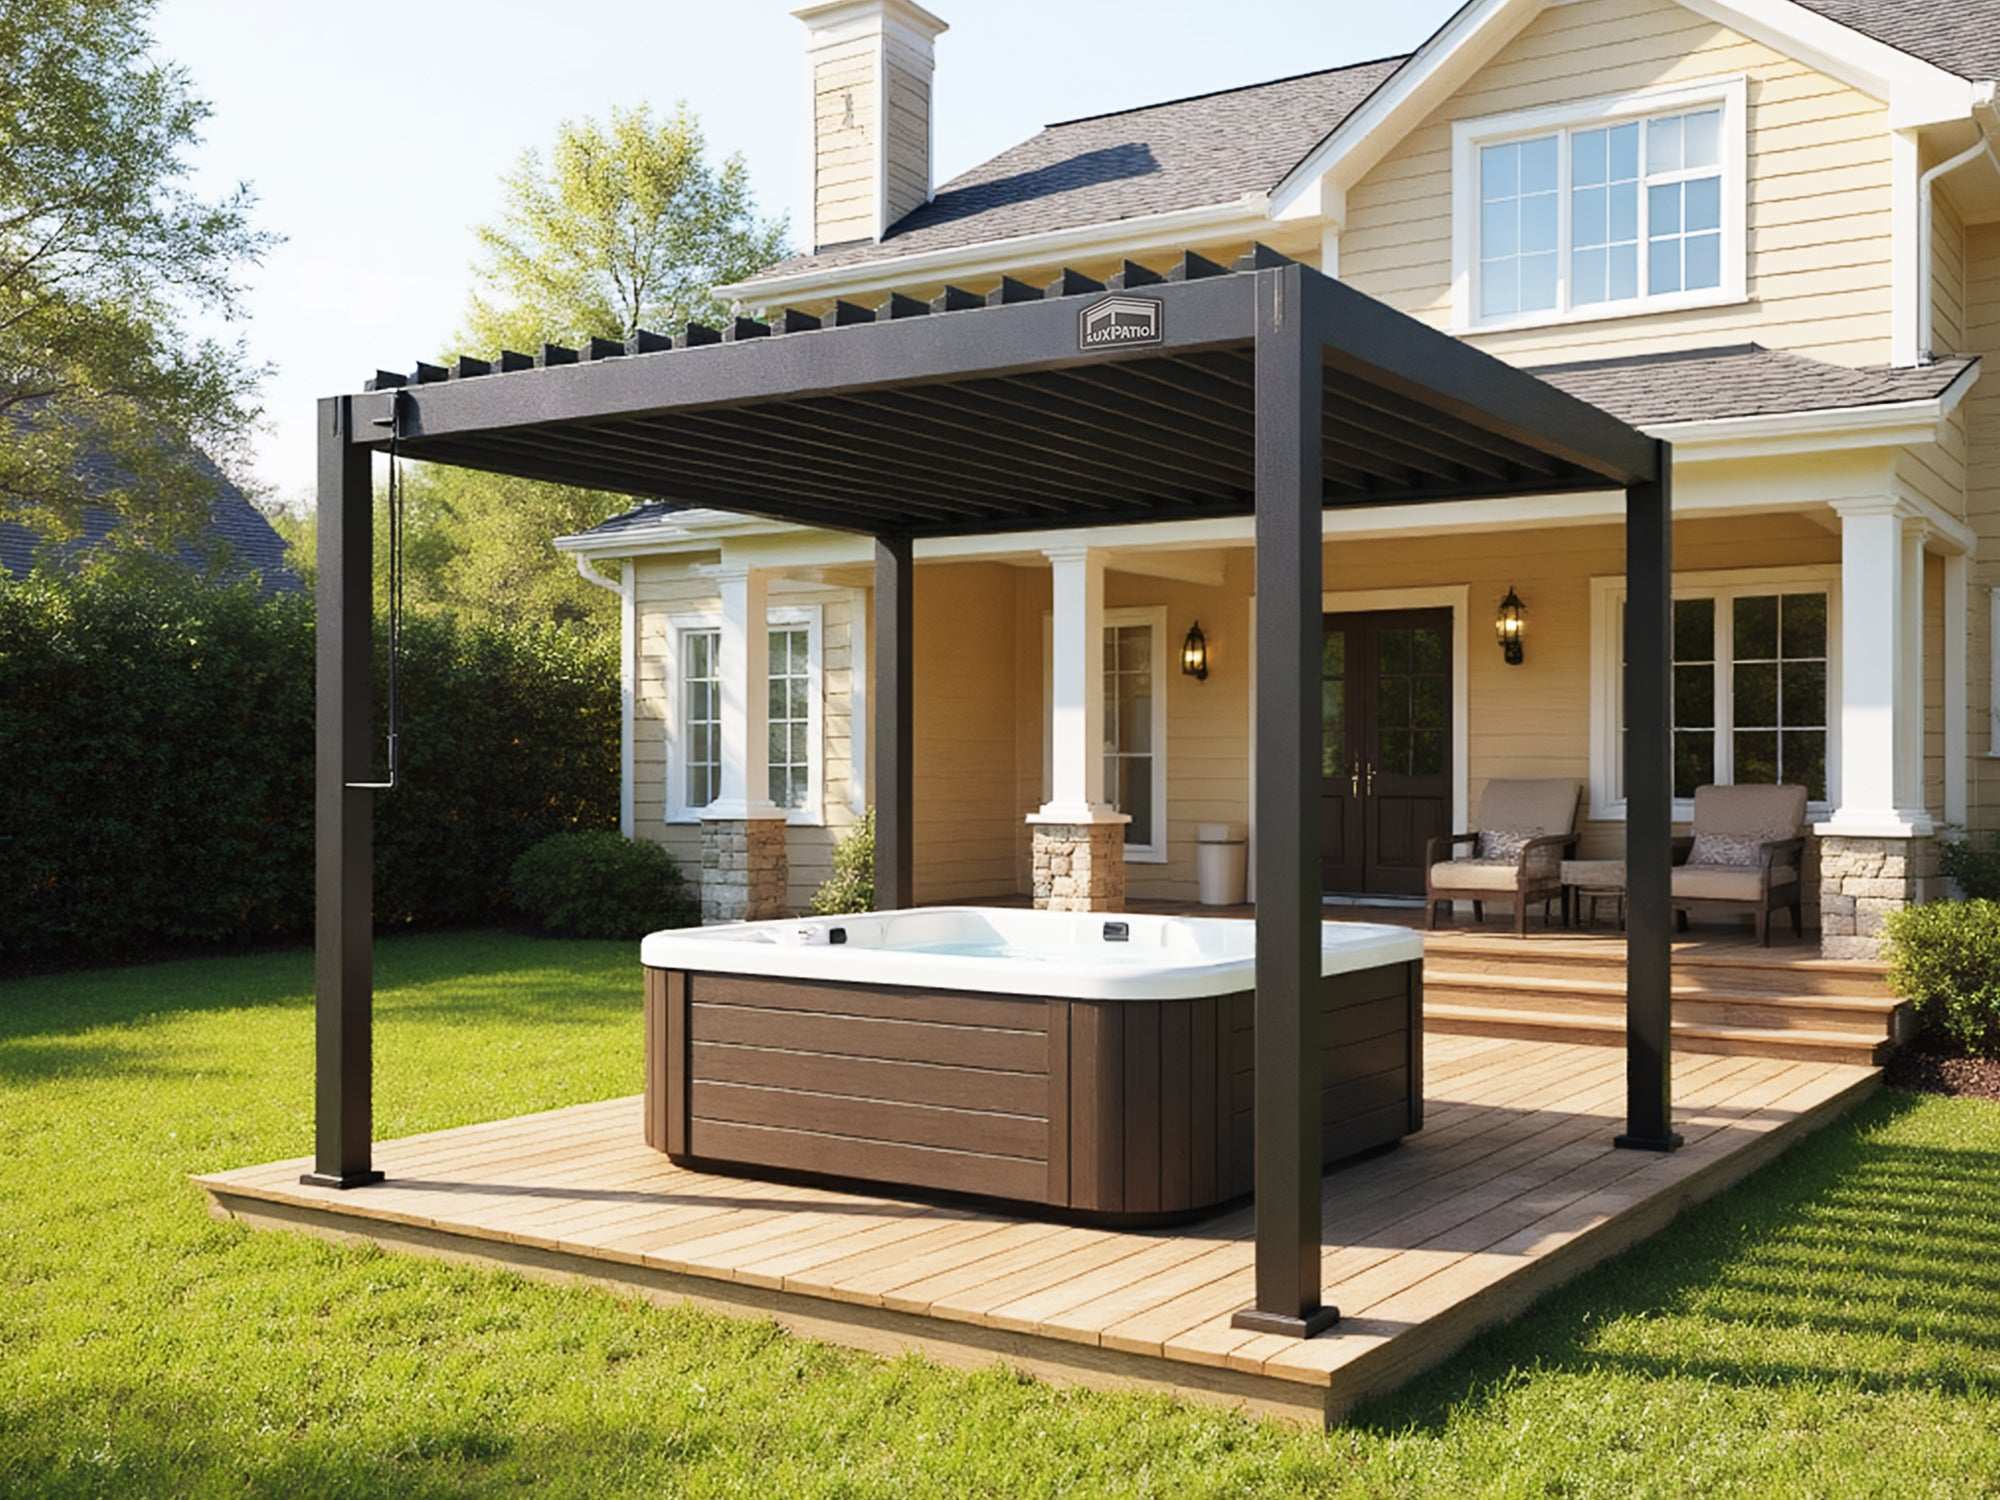
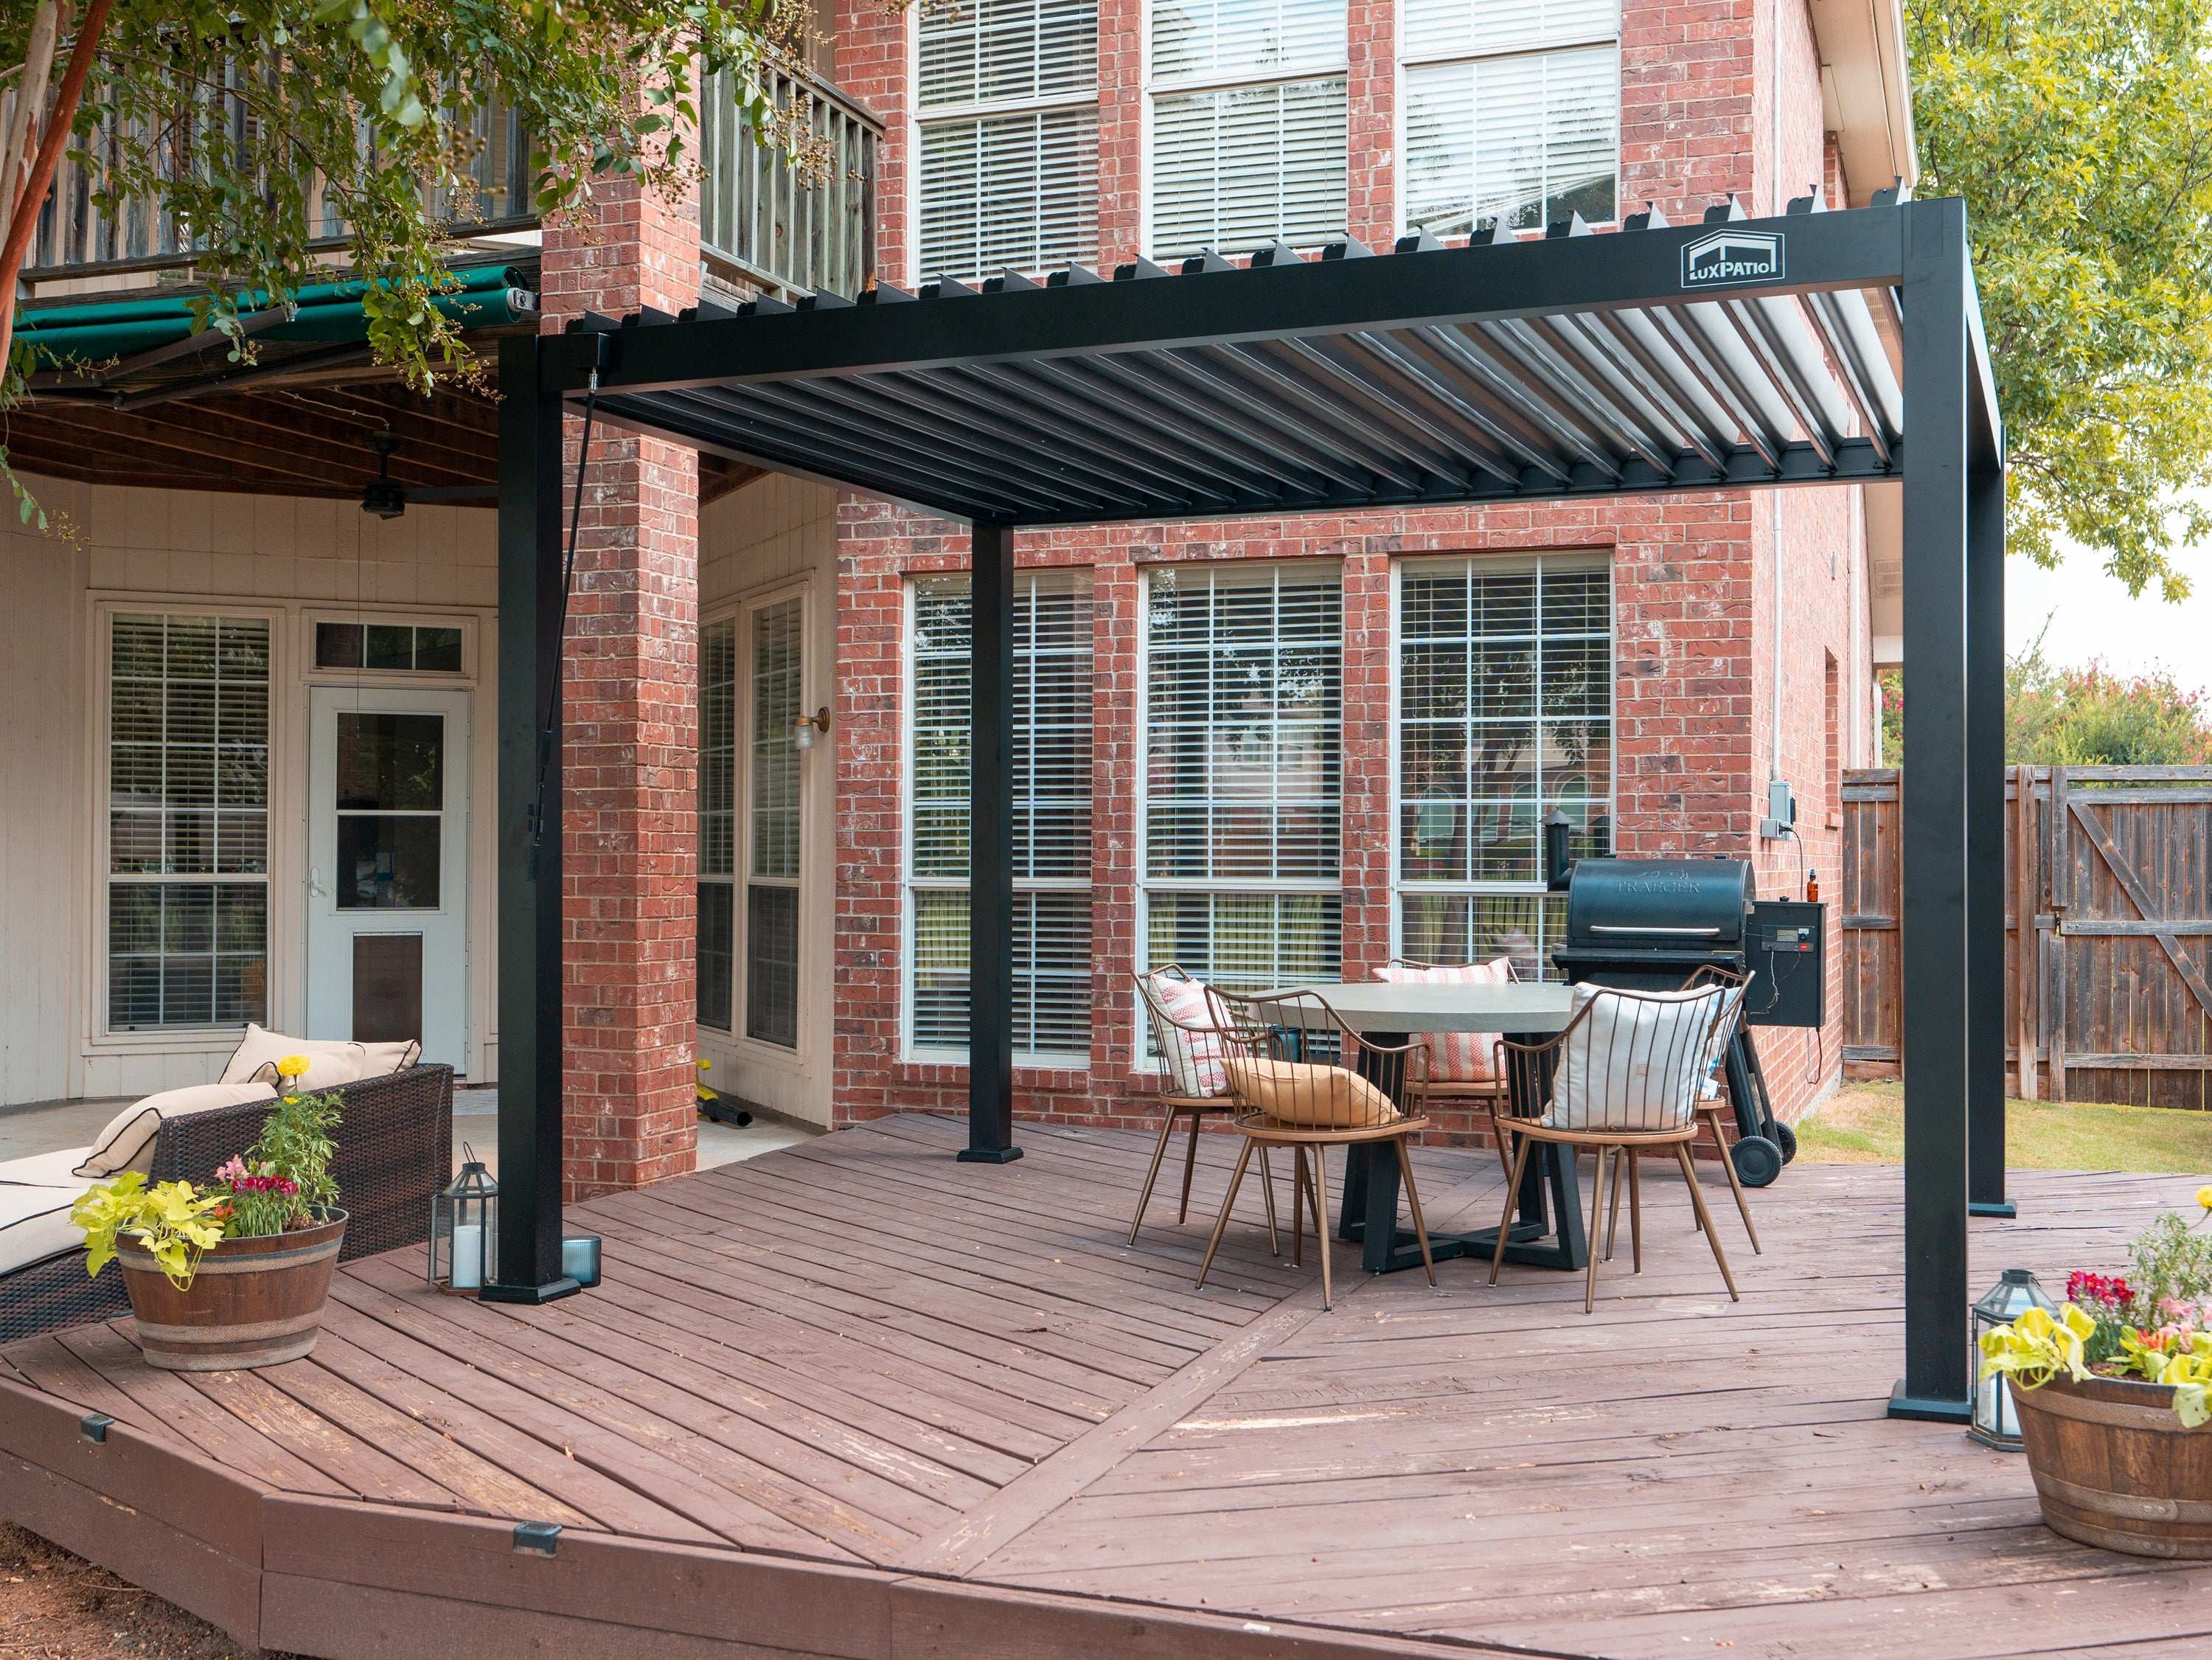
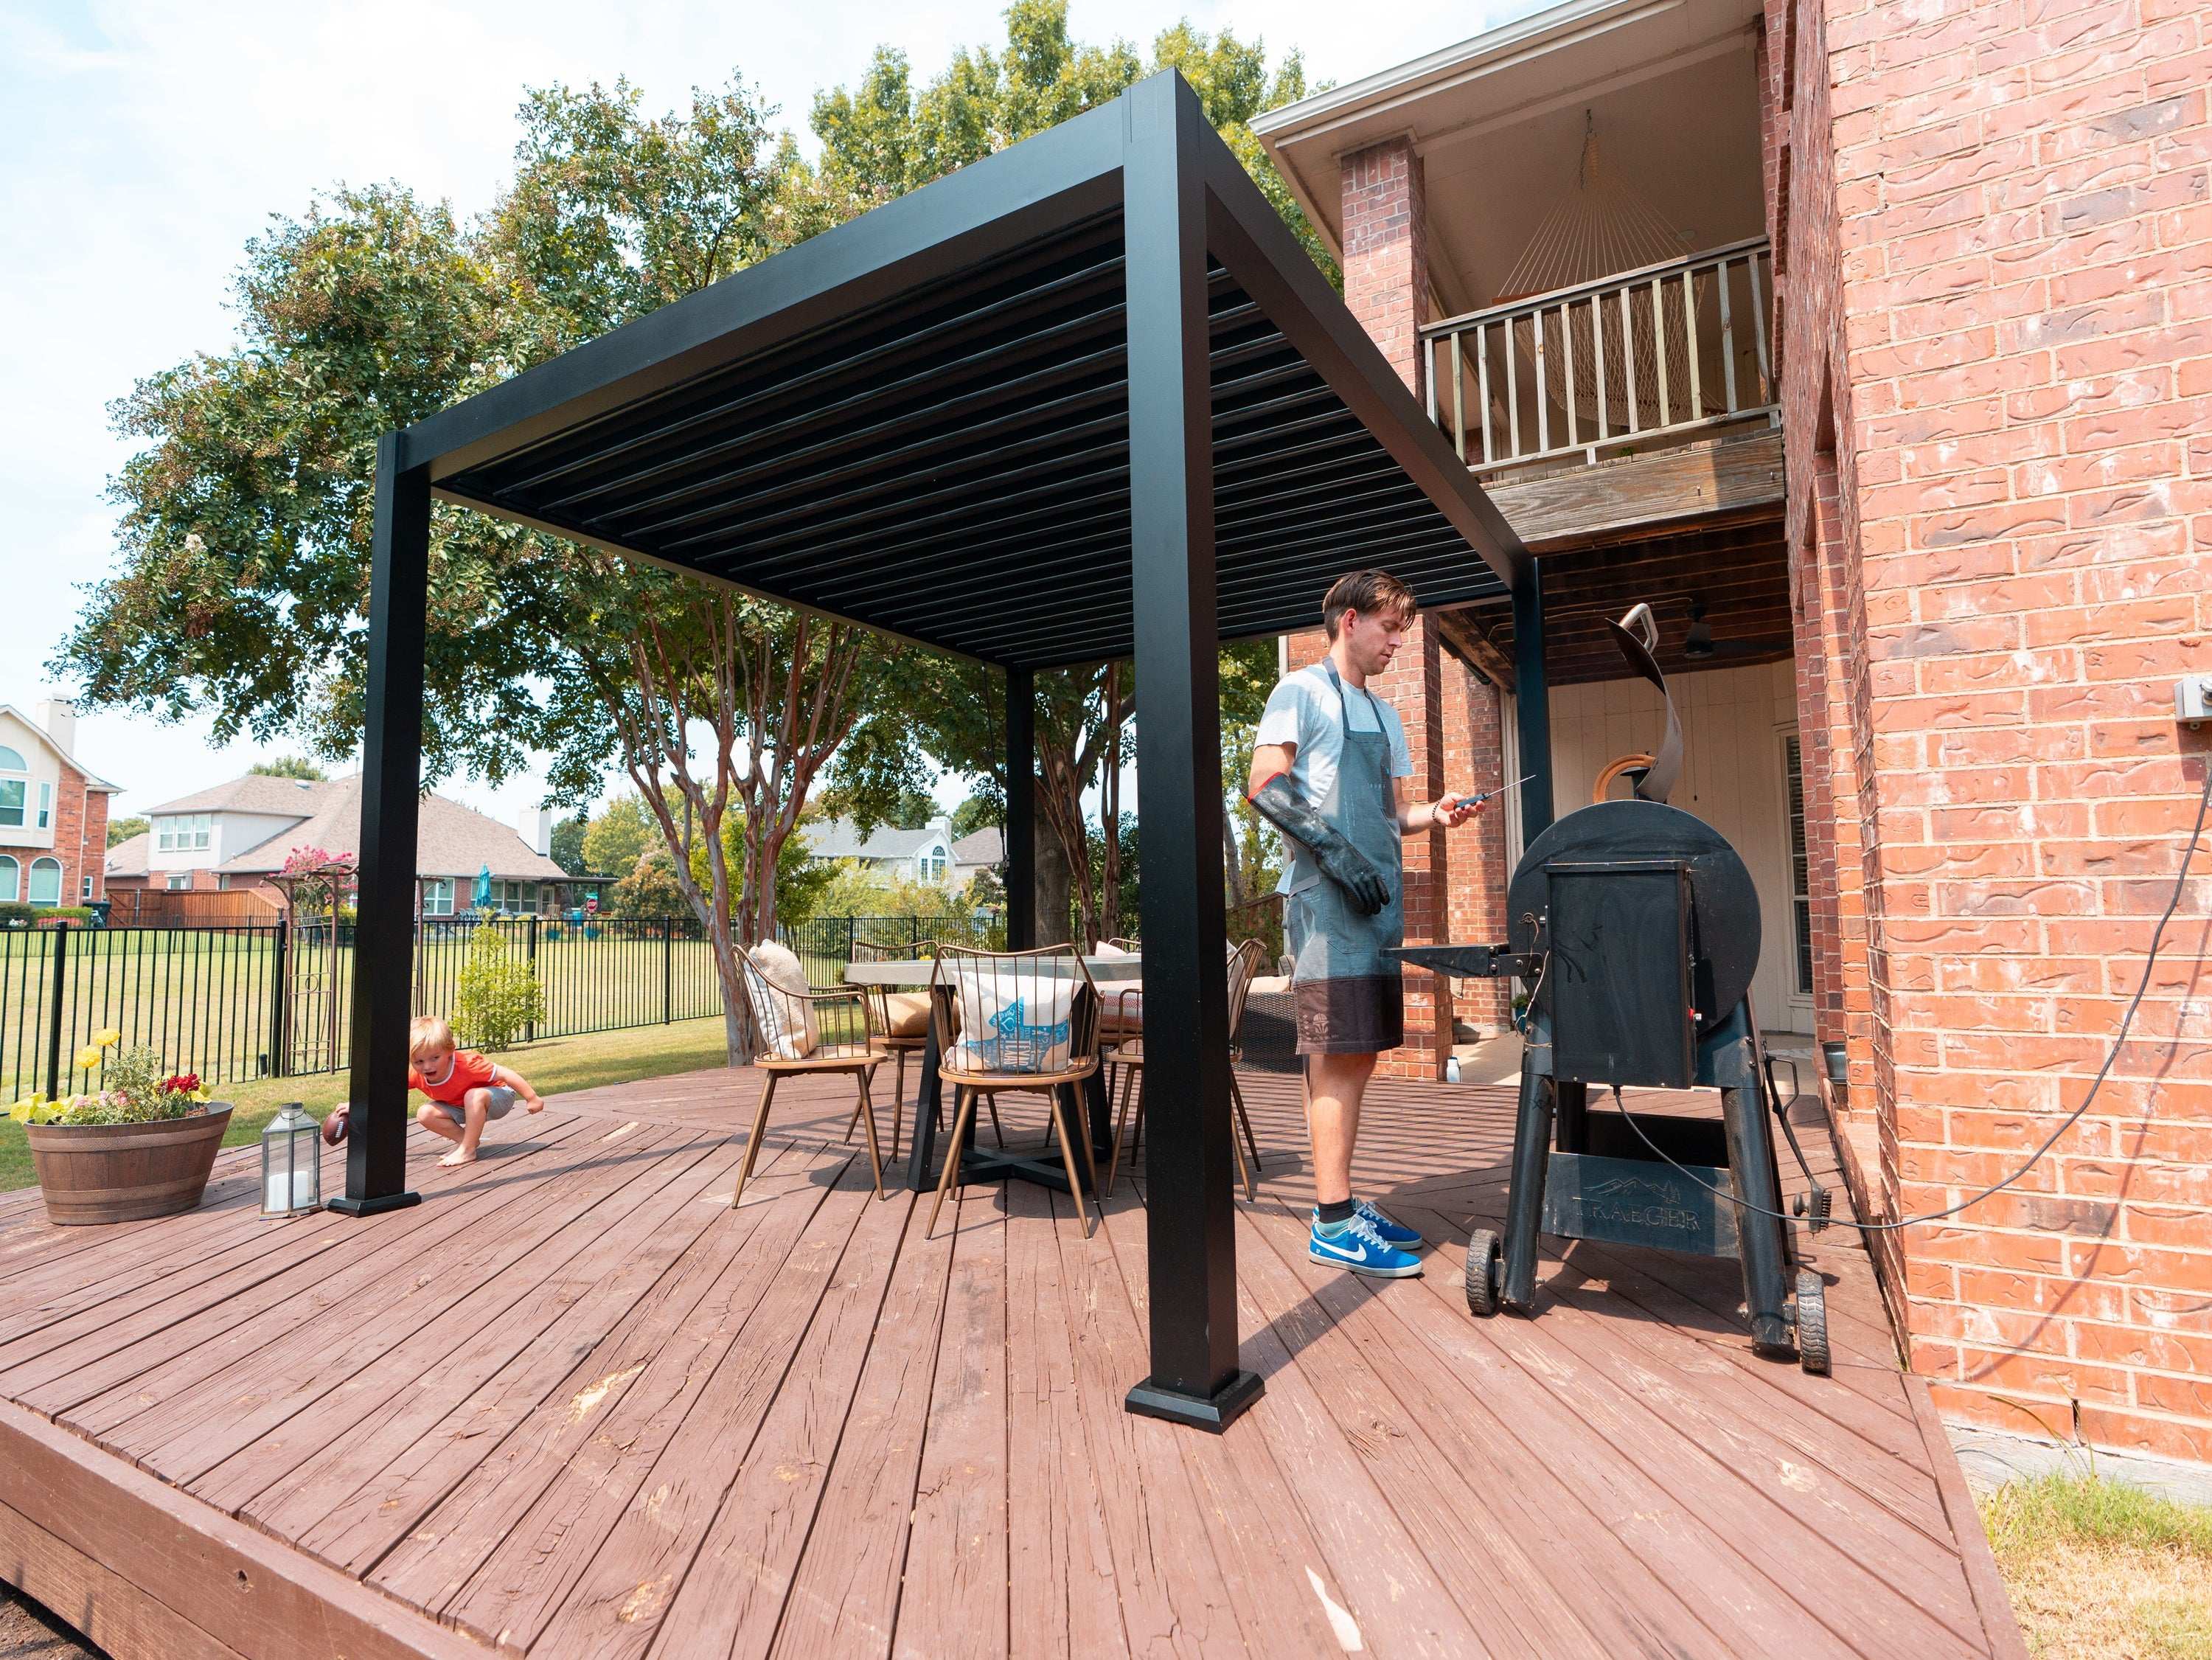
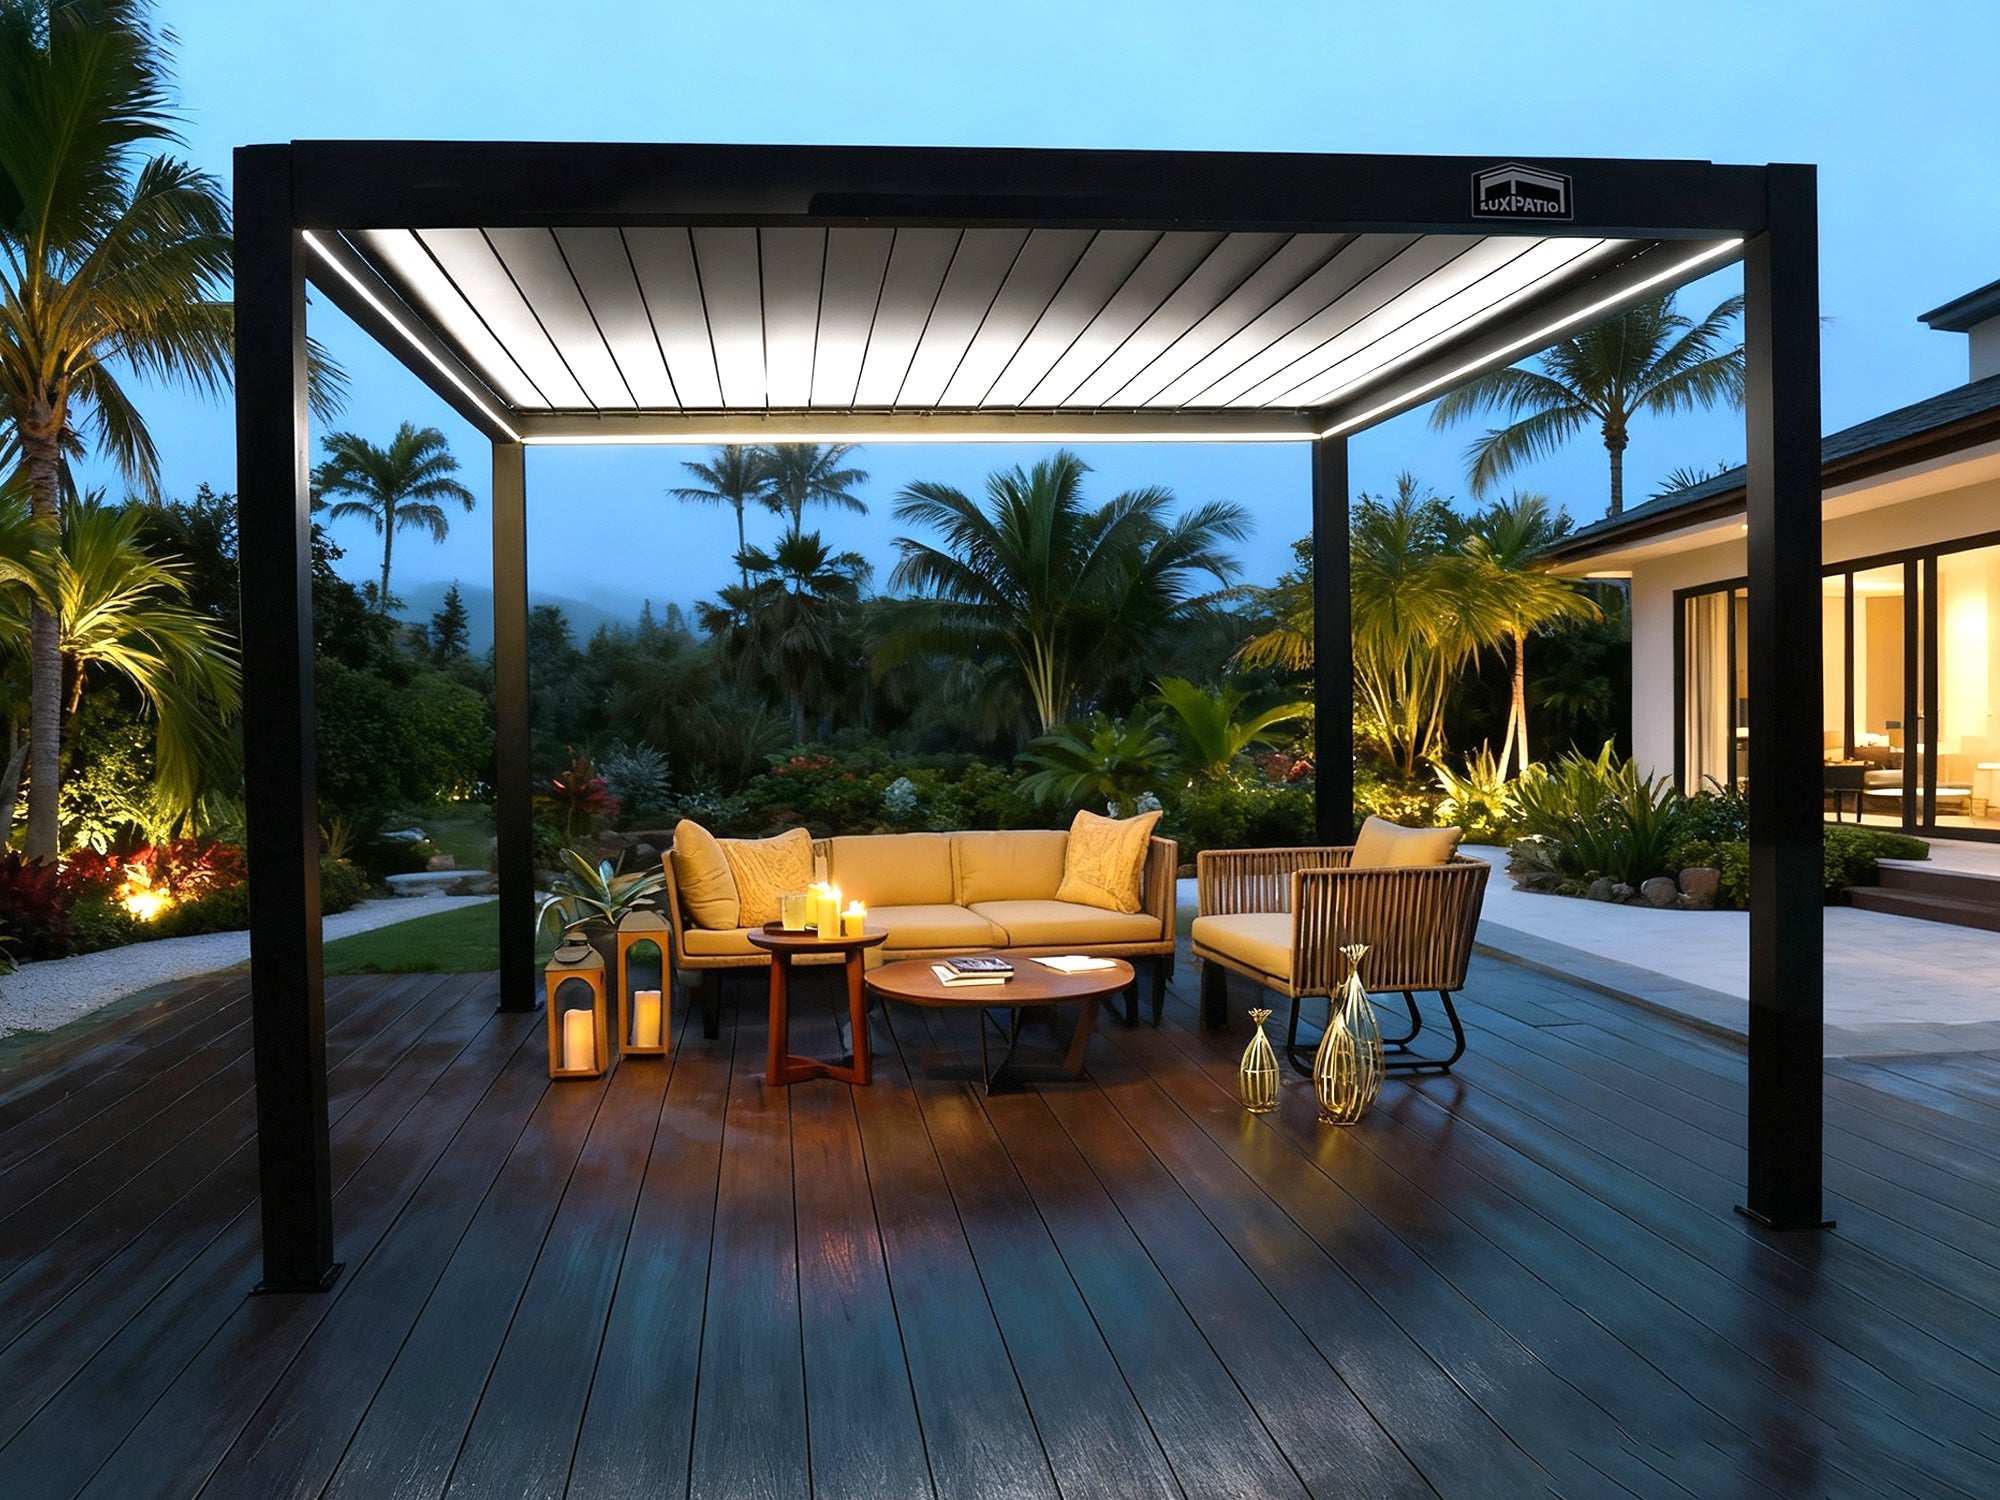
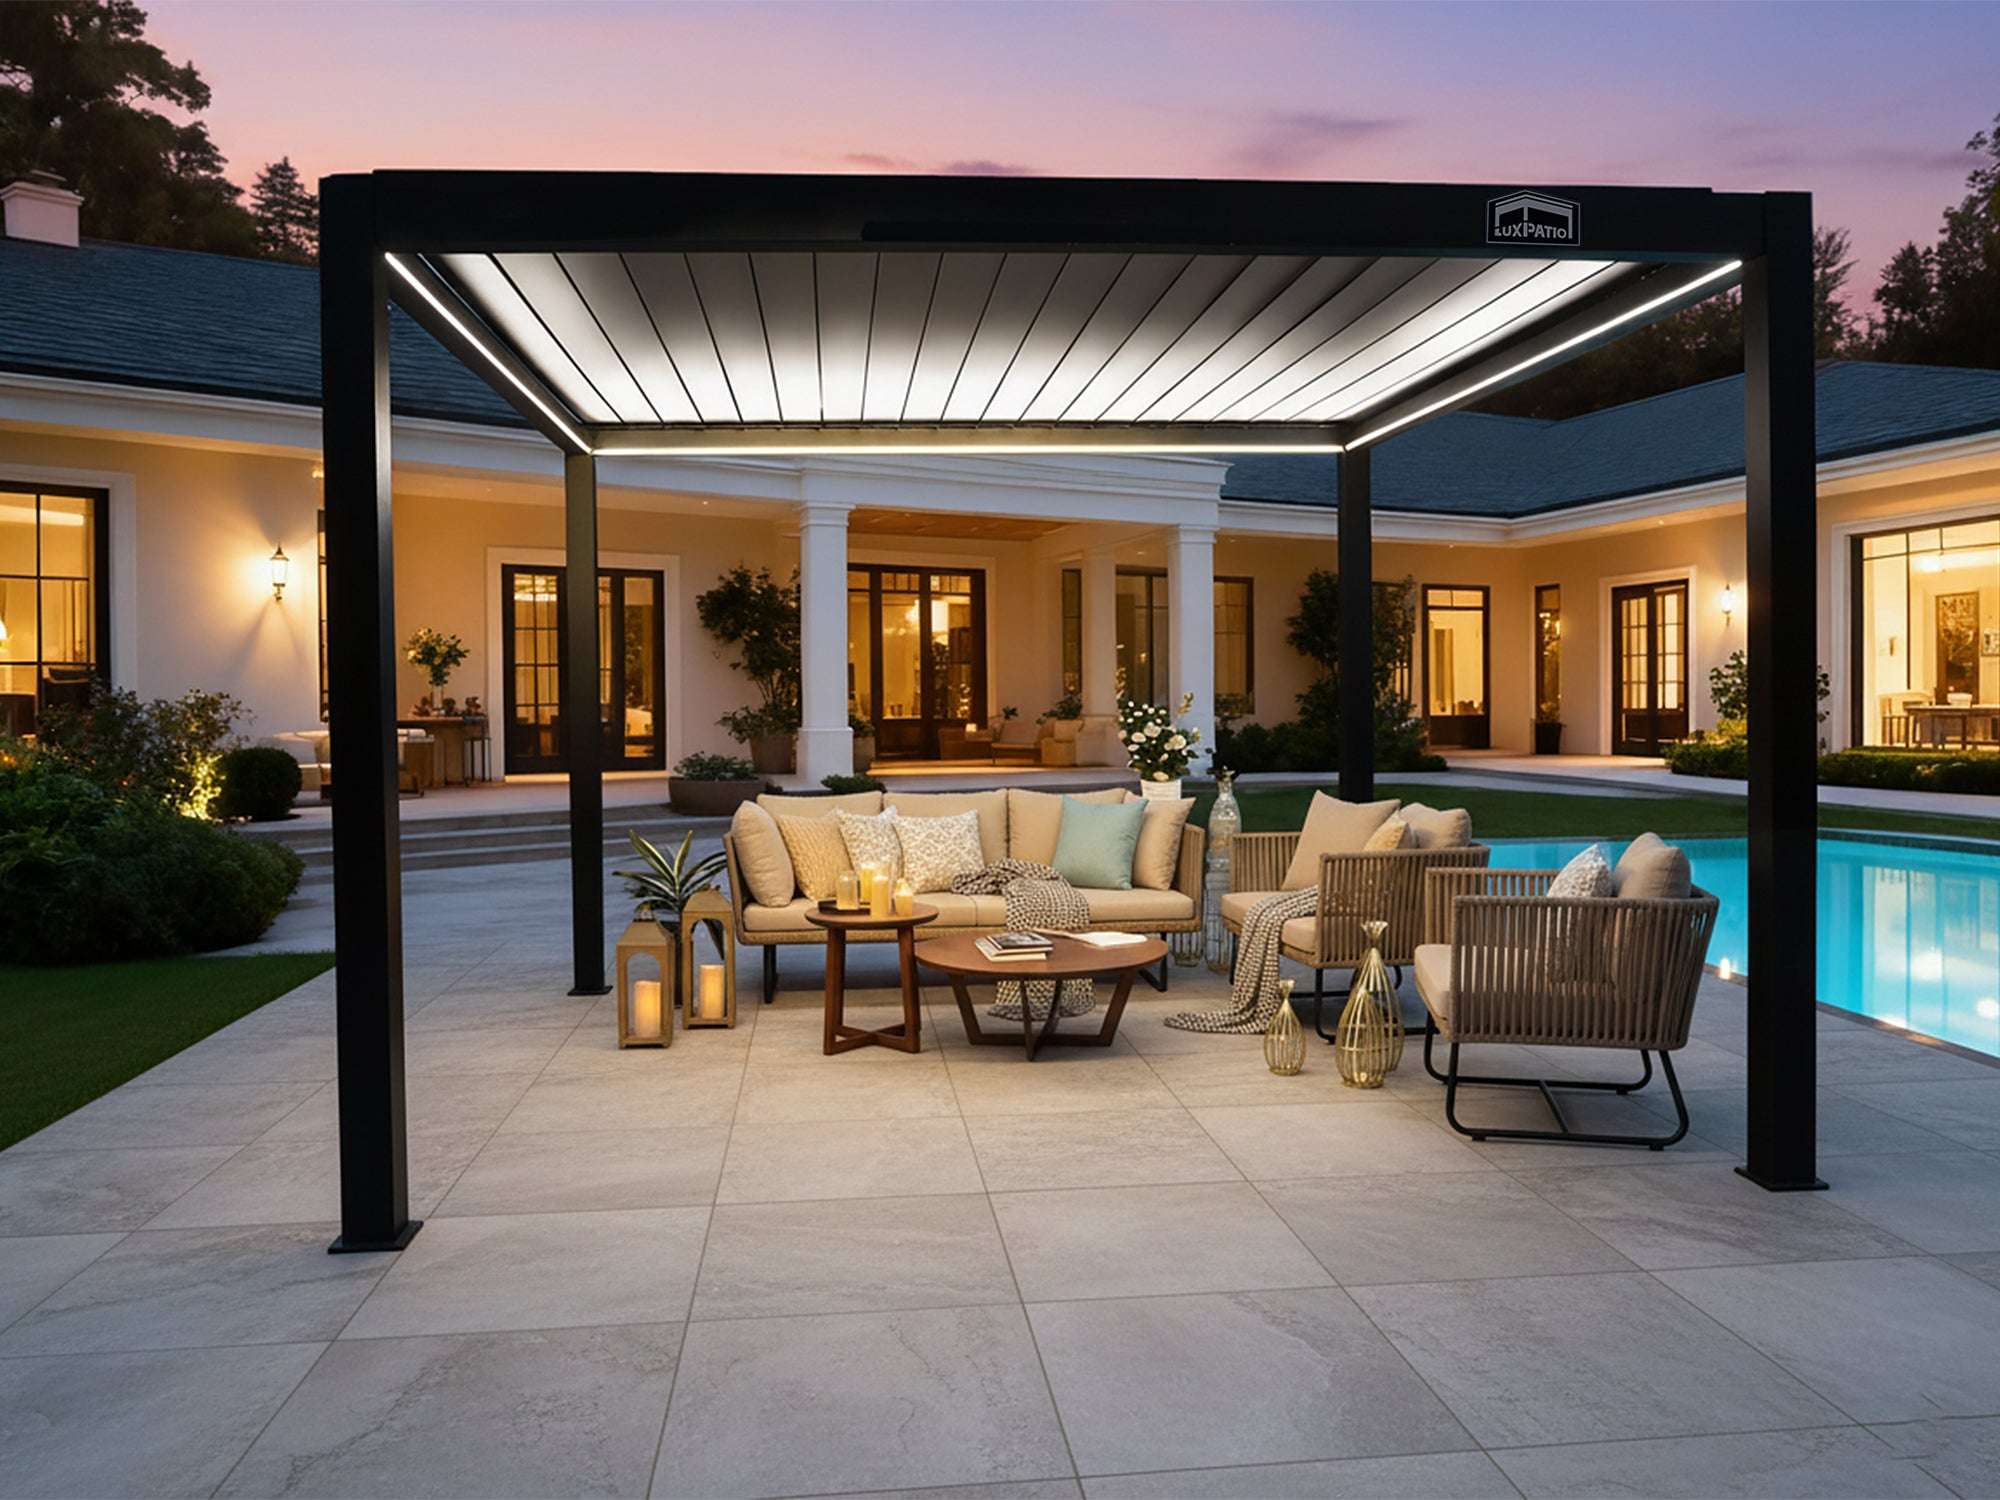
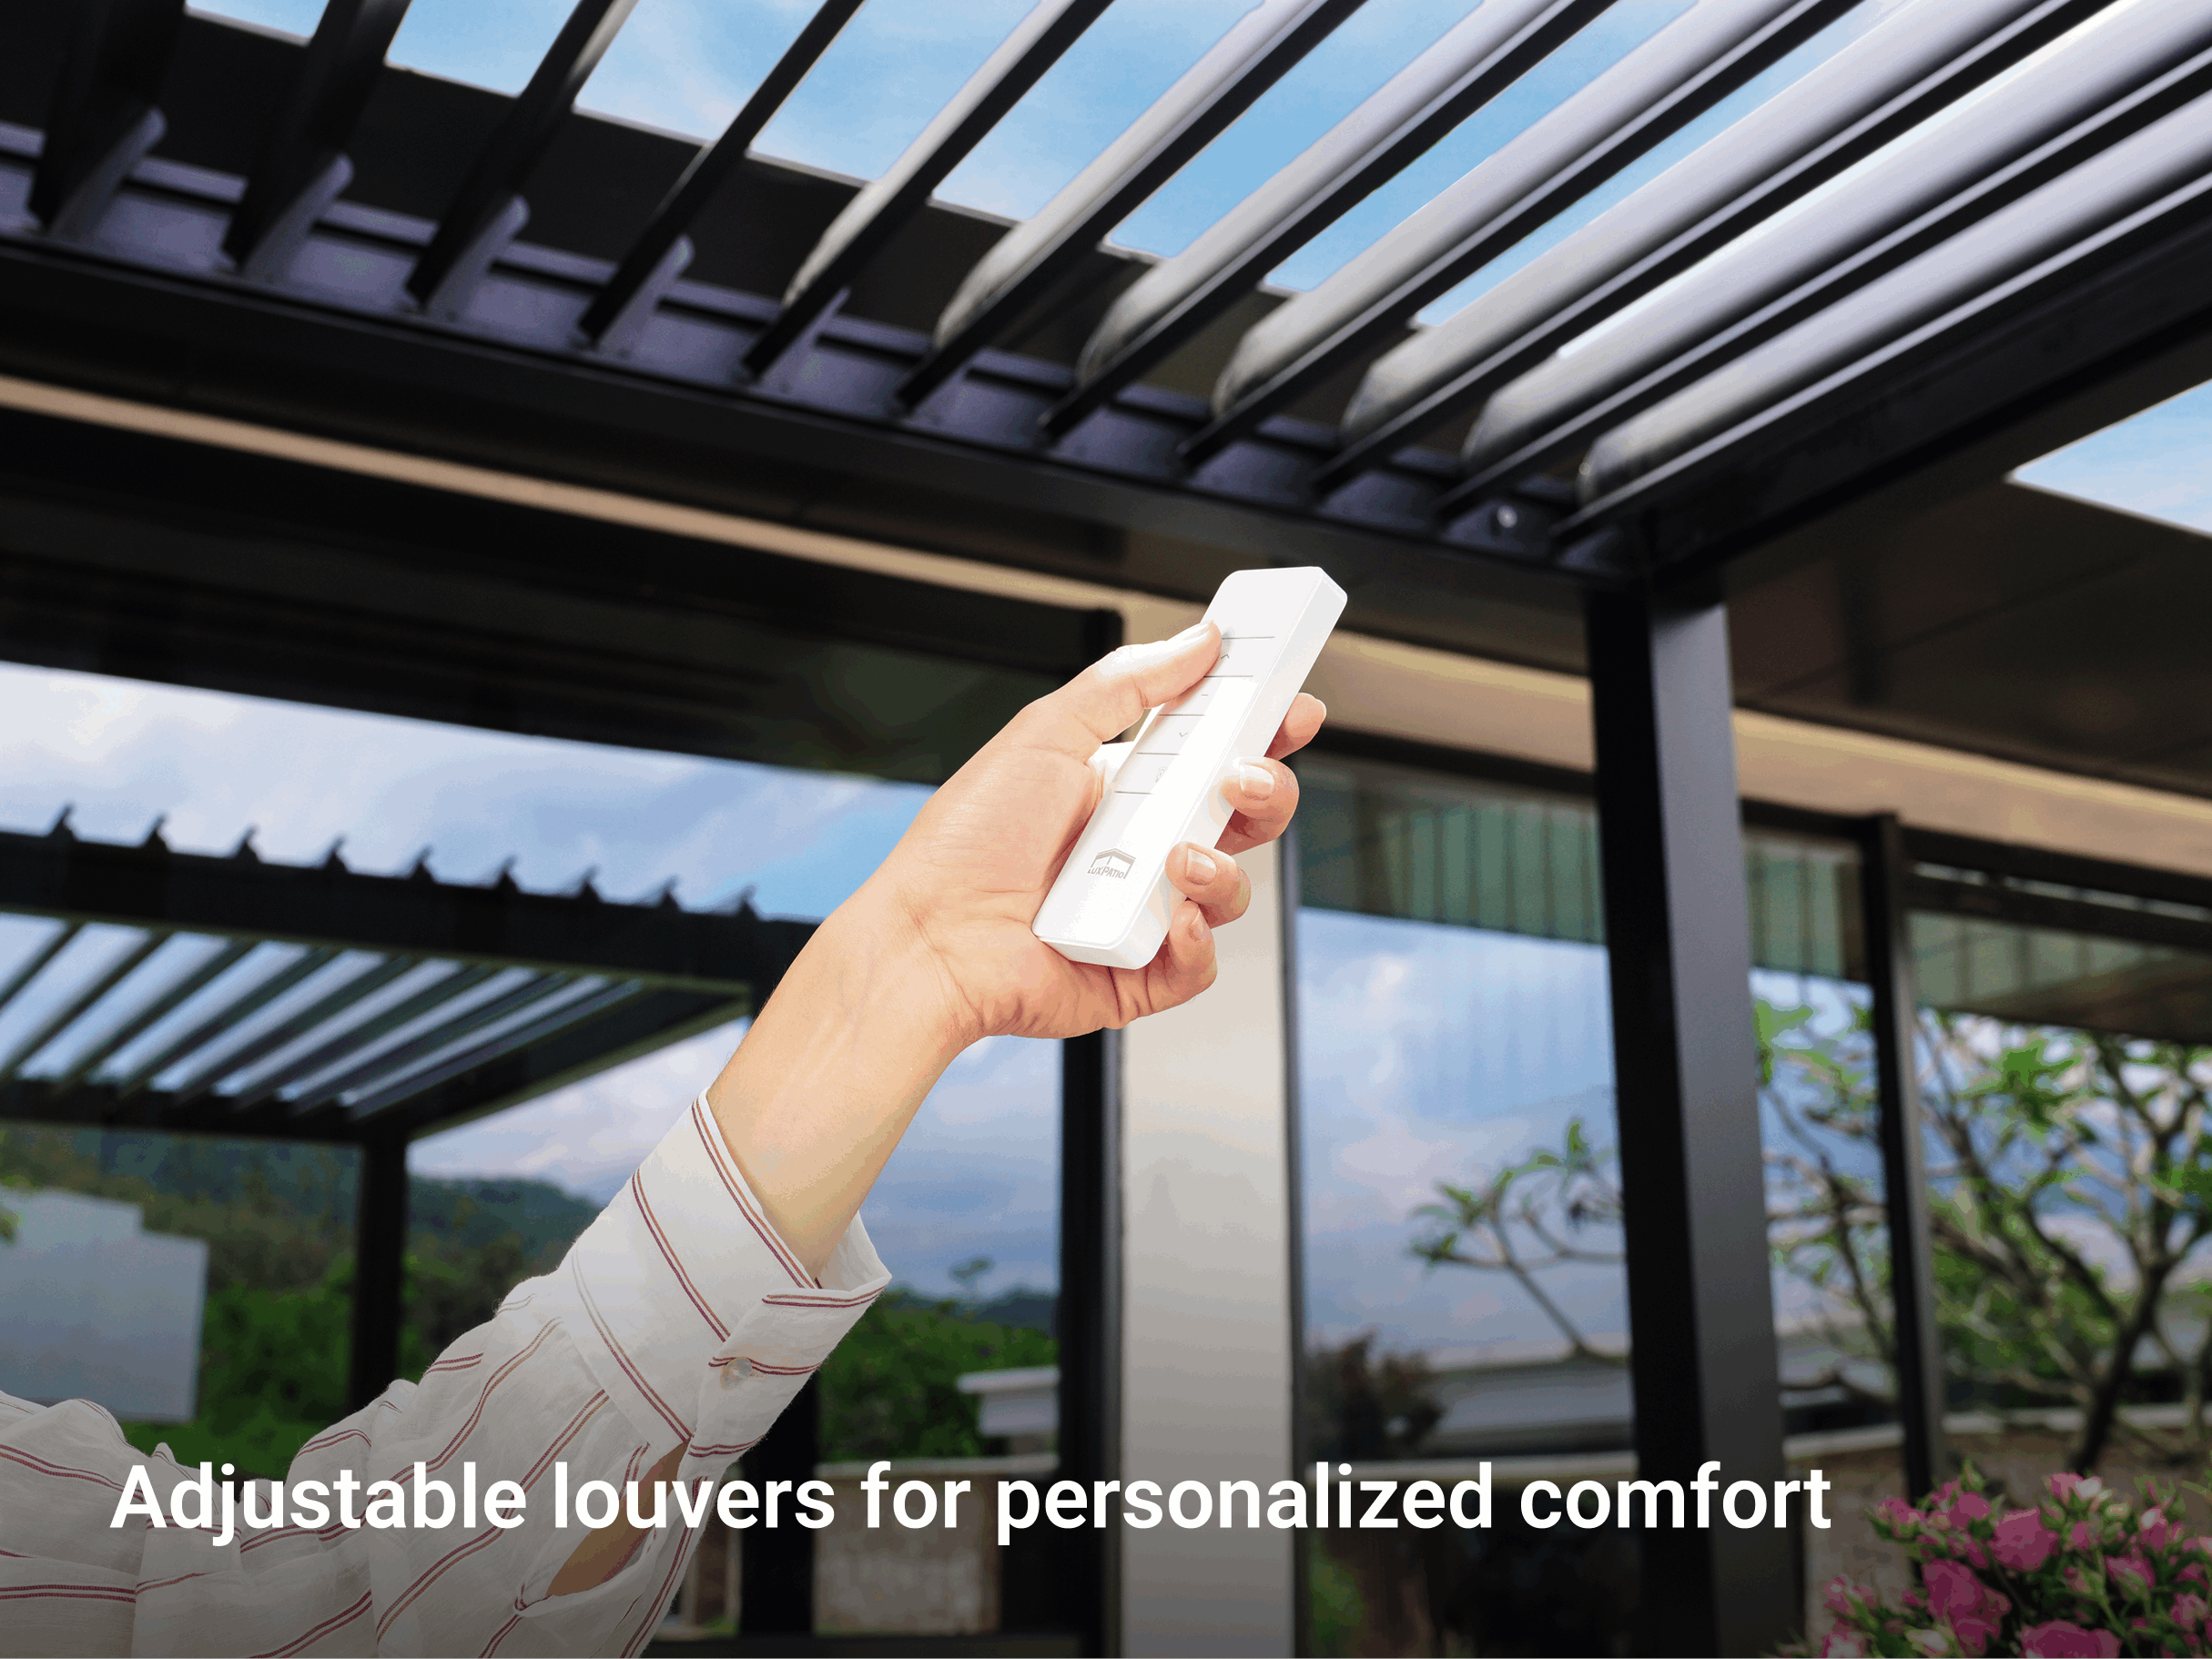
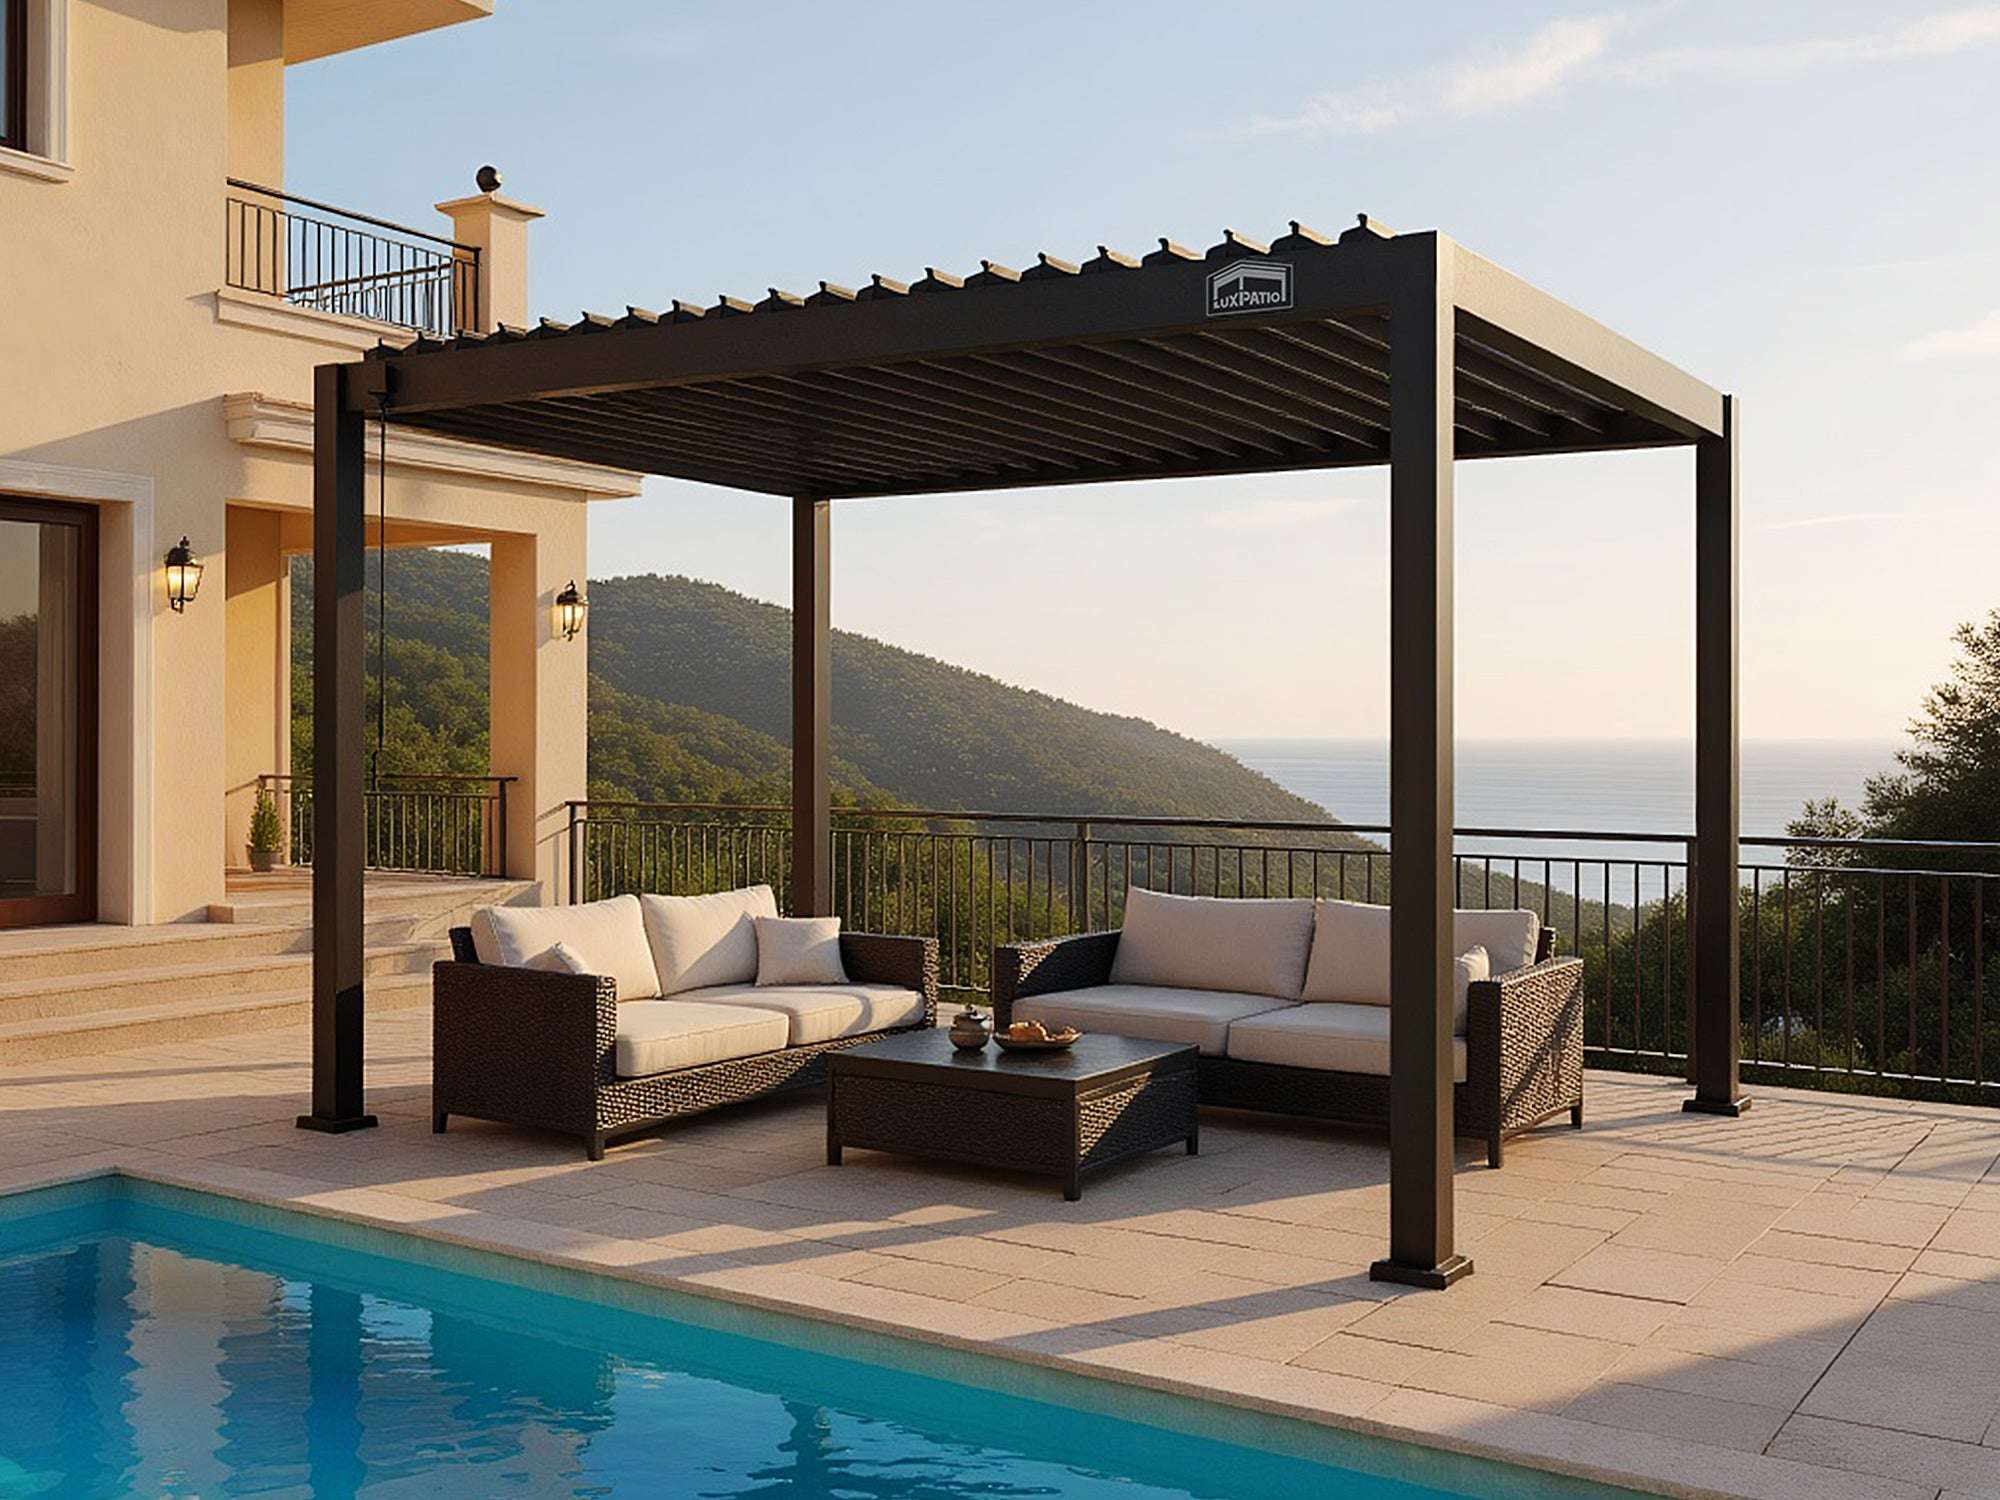
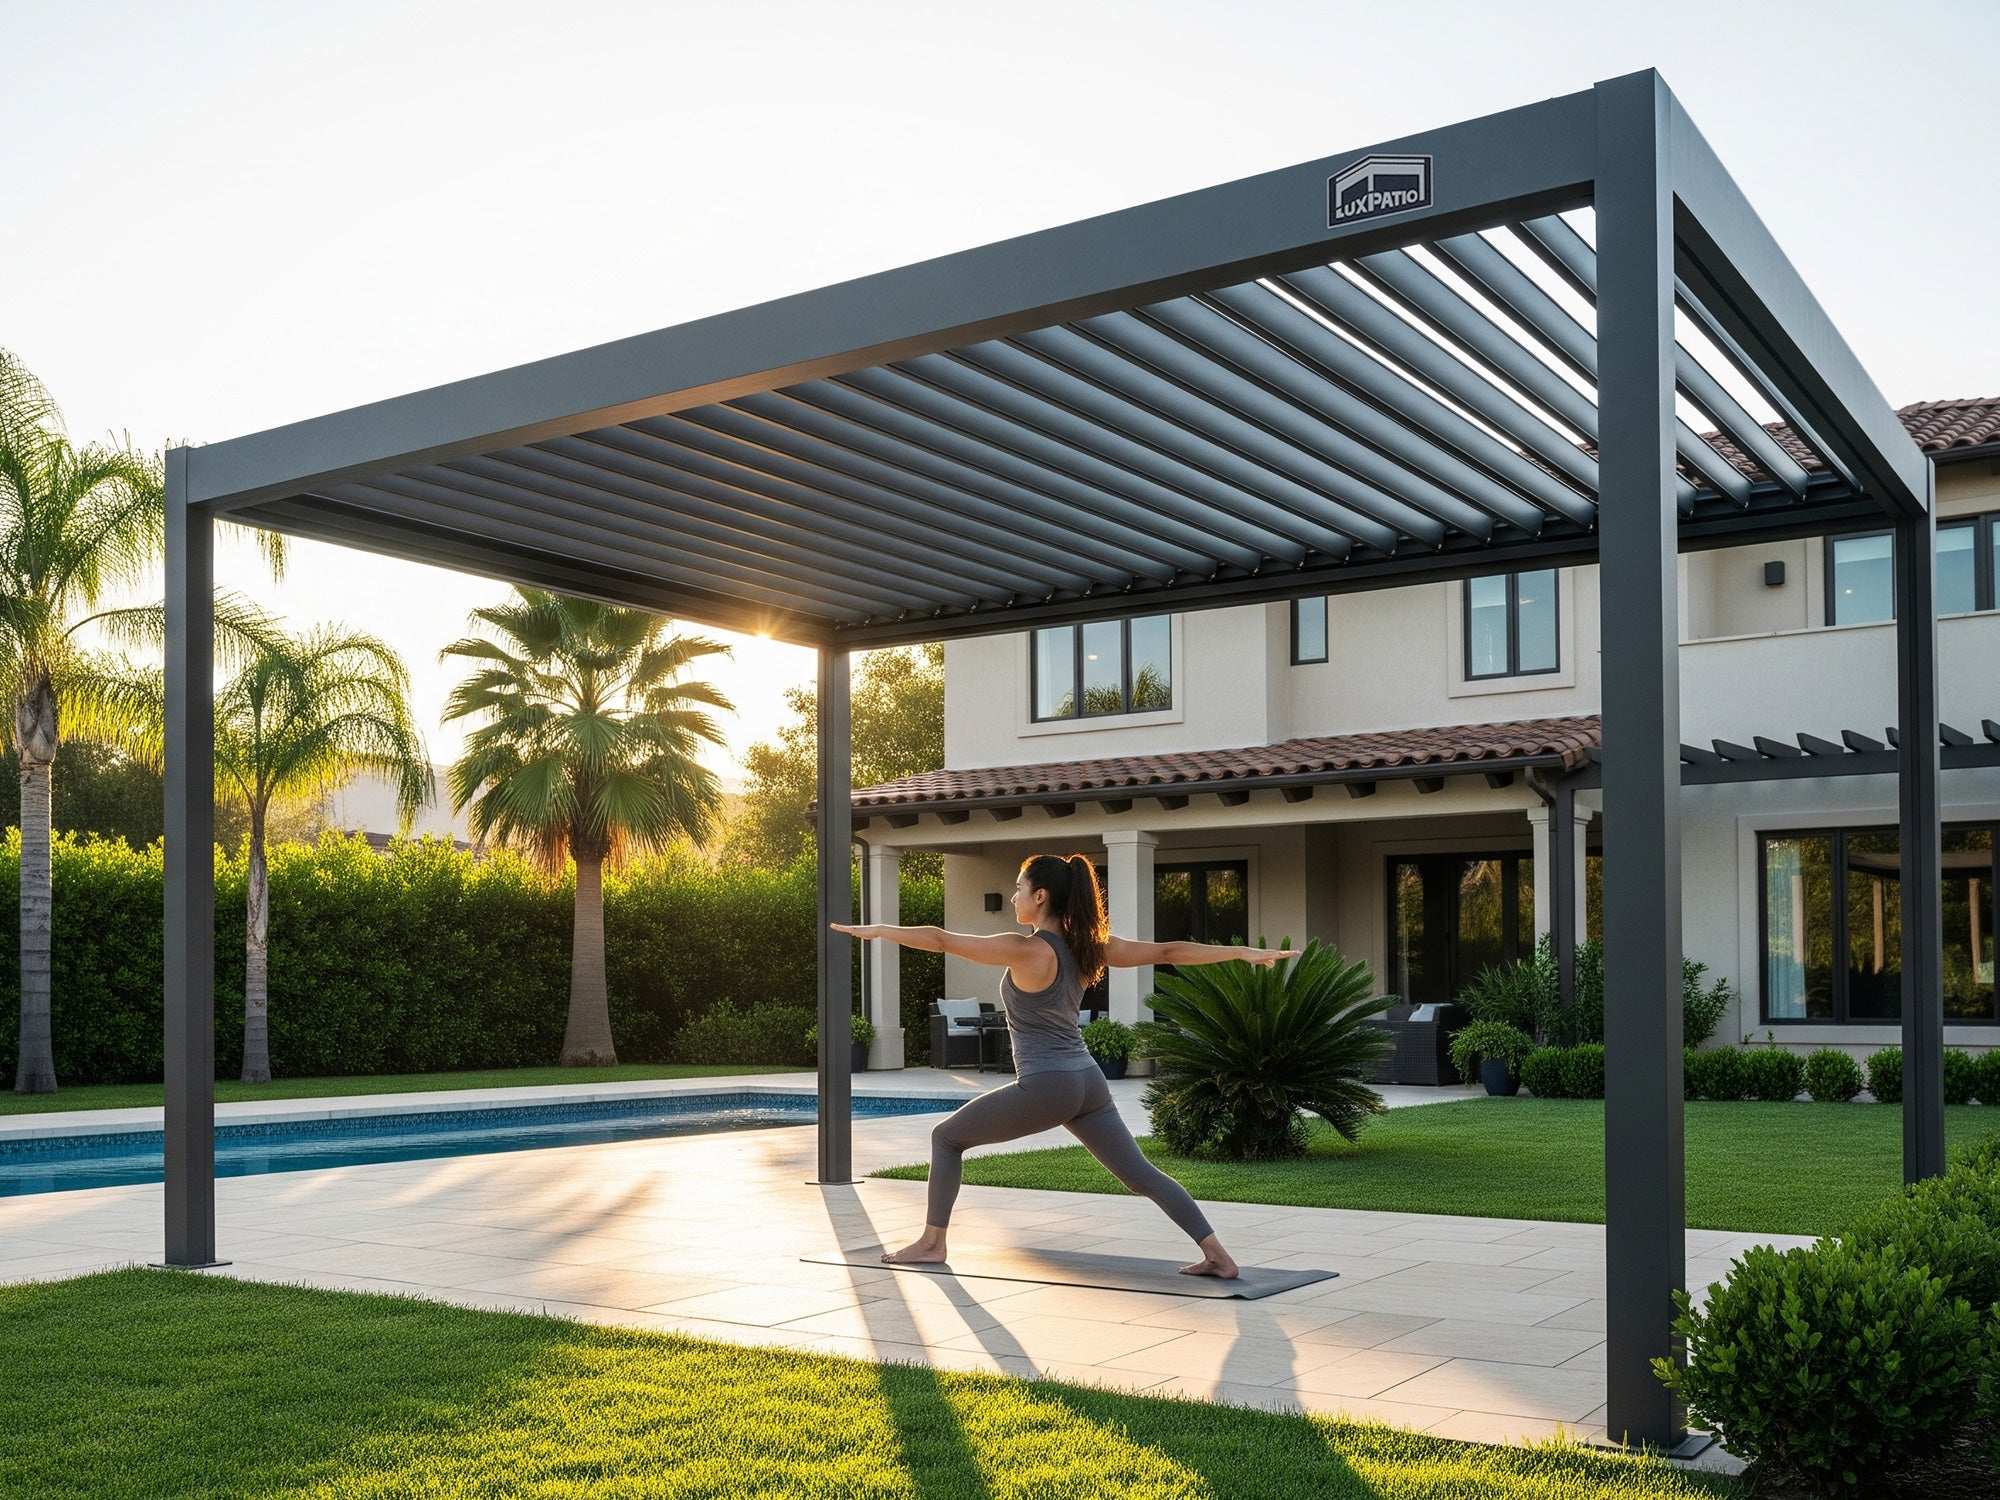
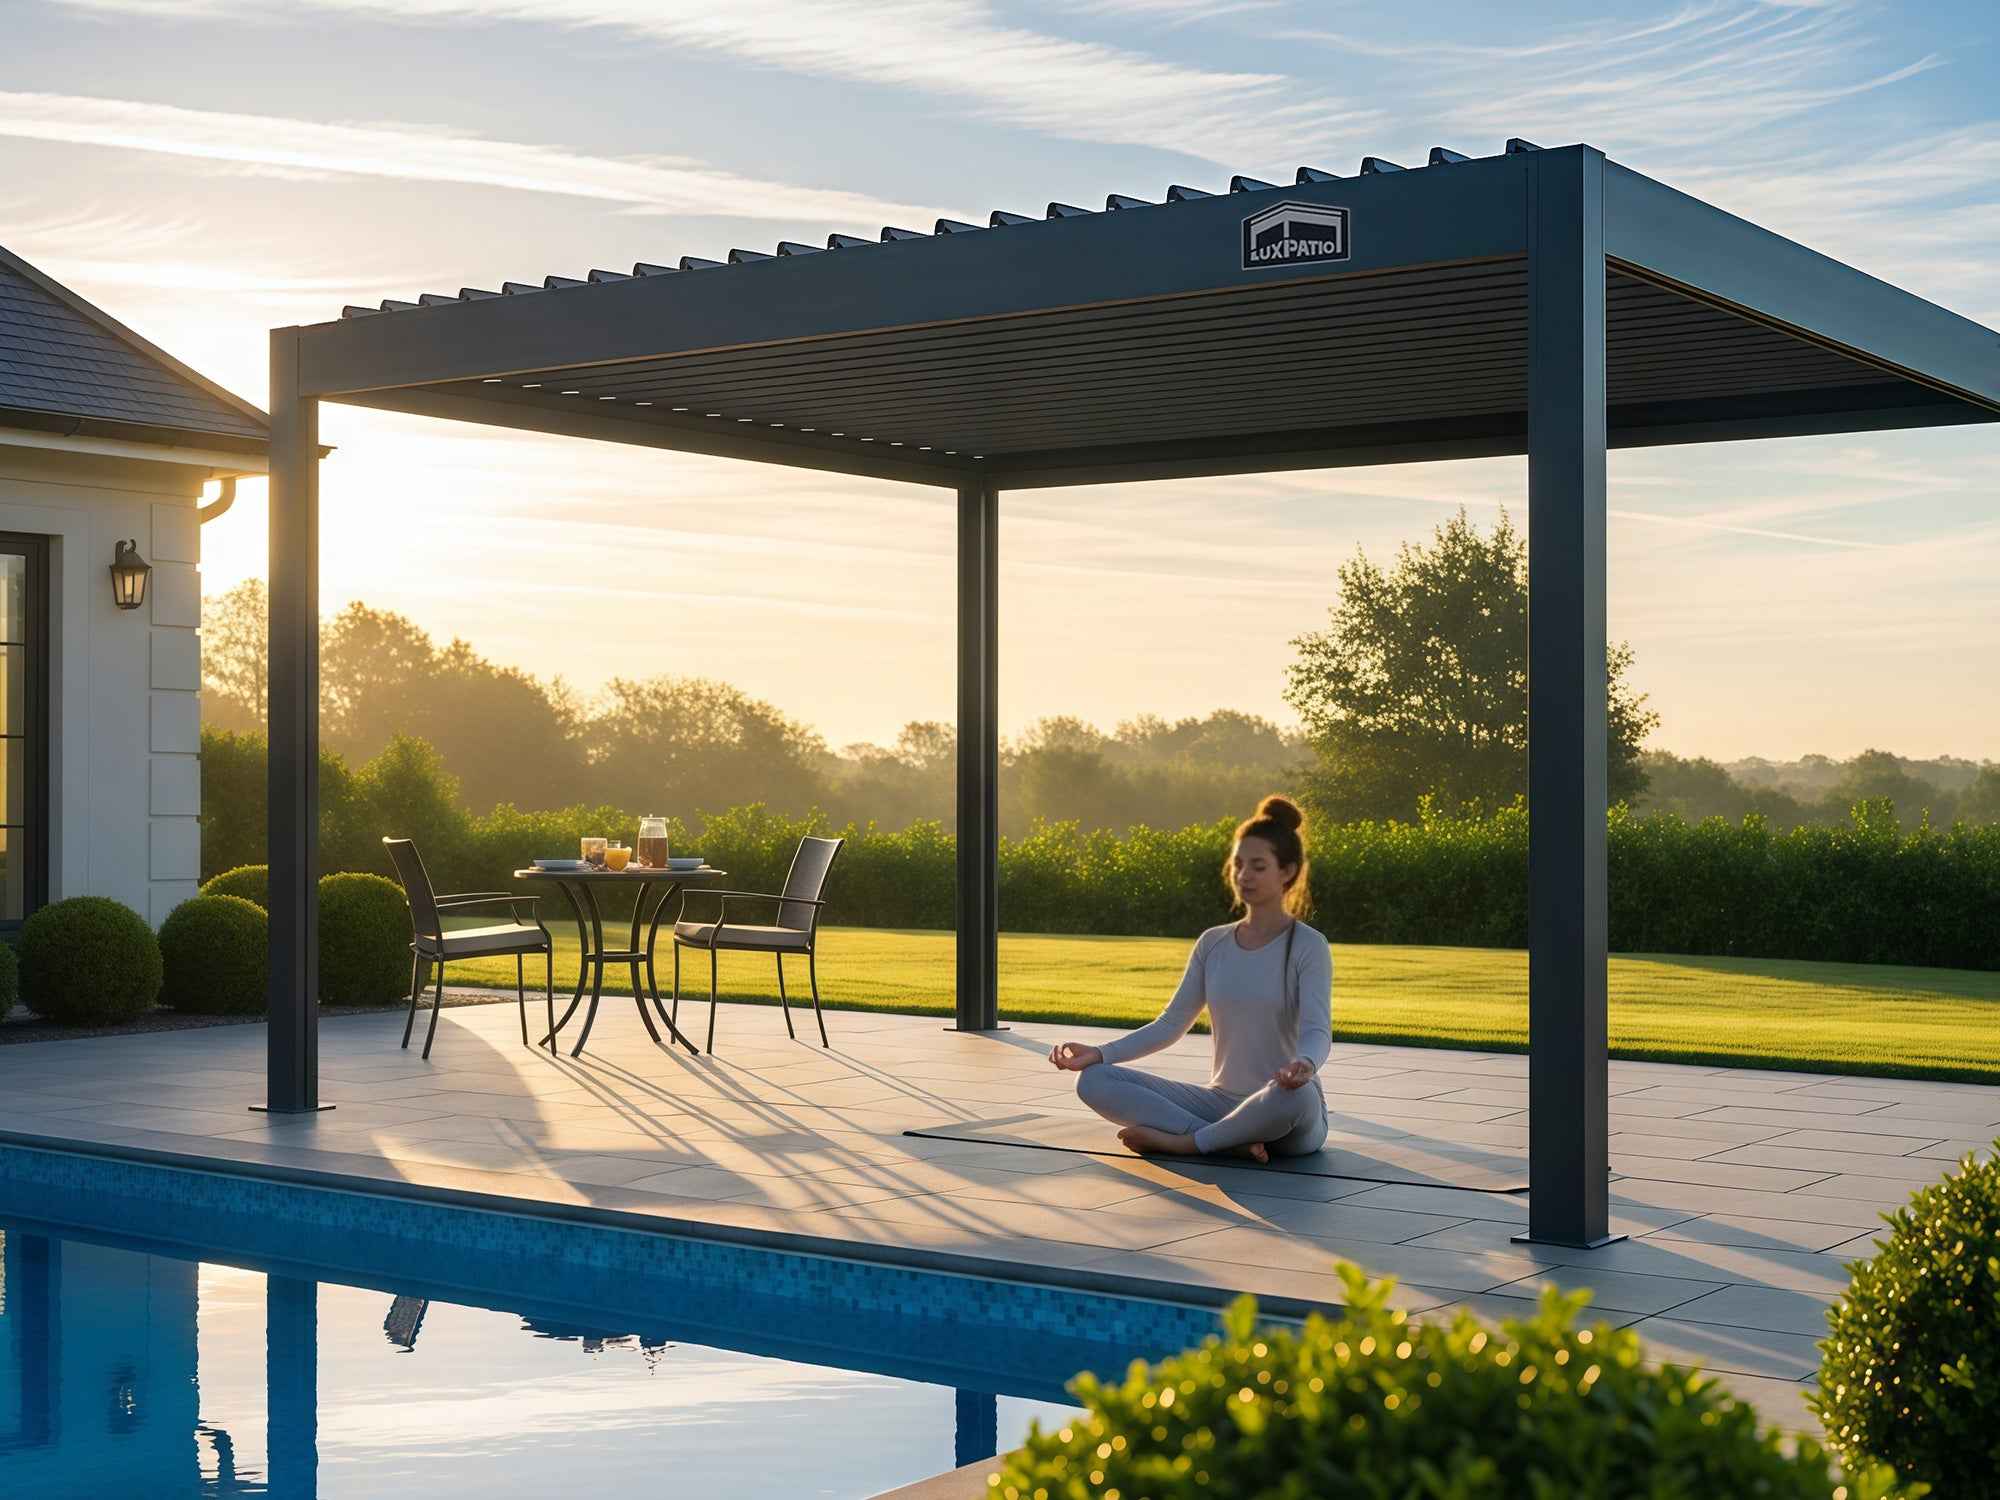
Aluminum Louvered Pergola
Louvre L5
Grill Pergola Lite
NestGrill N5
Grill Pergola Pro
NestGrill N5
Accessories
Grill Fan
NestGrill N5
Aluminum Slat Walls
NestGrill N5
Aluminum Grill Cabinets
NestGrill N5
Aluminum Slat Walls
Louvre L5
About Us
Reviews
Log in
Cart
0
Black Friday
Products
Products
Aluminum Louvered Pergola
Louvre L5
Grill Pergola Lite
NestGrill N5
Grill Pergola Pro
NestGrill N5
Accessories
Accessories
Grill Fan
NestGrill N5
Aluminum Slat Walls
NestGrill N5
Aluminum Grill Cabinets
NestGrill N5
Aluminum Slat Walls
Louvre L5
About Us
Reviews
Home
Louvre L5
Aluminum Louvered Pergola
Skip to product information
Open media 0 in modal
Open media 1 in modal
Open media 2 in modal
Open media 3 in modal
Open media 4 in modal
Open media 5 in modal
Open media 6 in modal
Open media 7 in modal
Open media 8 in modal
Open media 9 in modal
Open media 10 in modal
Open media 11 in modal
Open media 12 in modal
Open media 13 in modal
Open media 14 in modal
Open media 15 in modal
Open media 16 in modal
Open media 17 in modal
Open media 18 in modal
Open media 19 in modal
Open media 20 in modal
Open media 21 in modal
Louvre L5
Aluminum Louvered Pergola
Aluminum Louvered Pergola
Save
$2,208.00
Regular price
$4,692.00
Sale price
$4,692.00
Regular price
$6,900.00
Unit price
/
per
Free $1,000 Installation
48-Hour Shipping